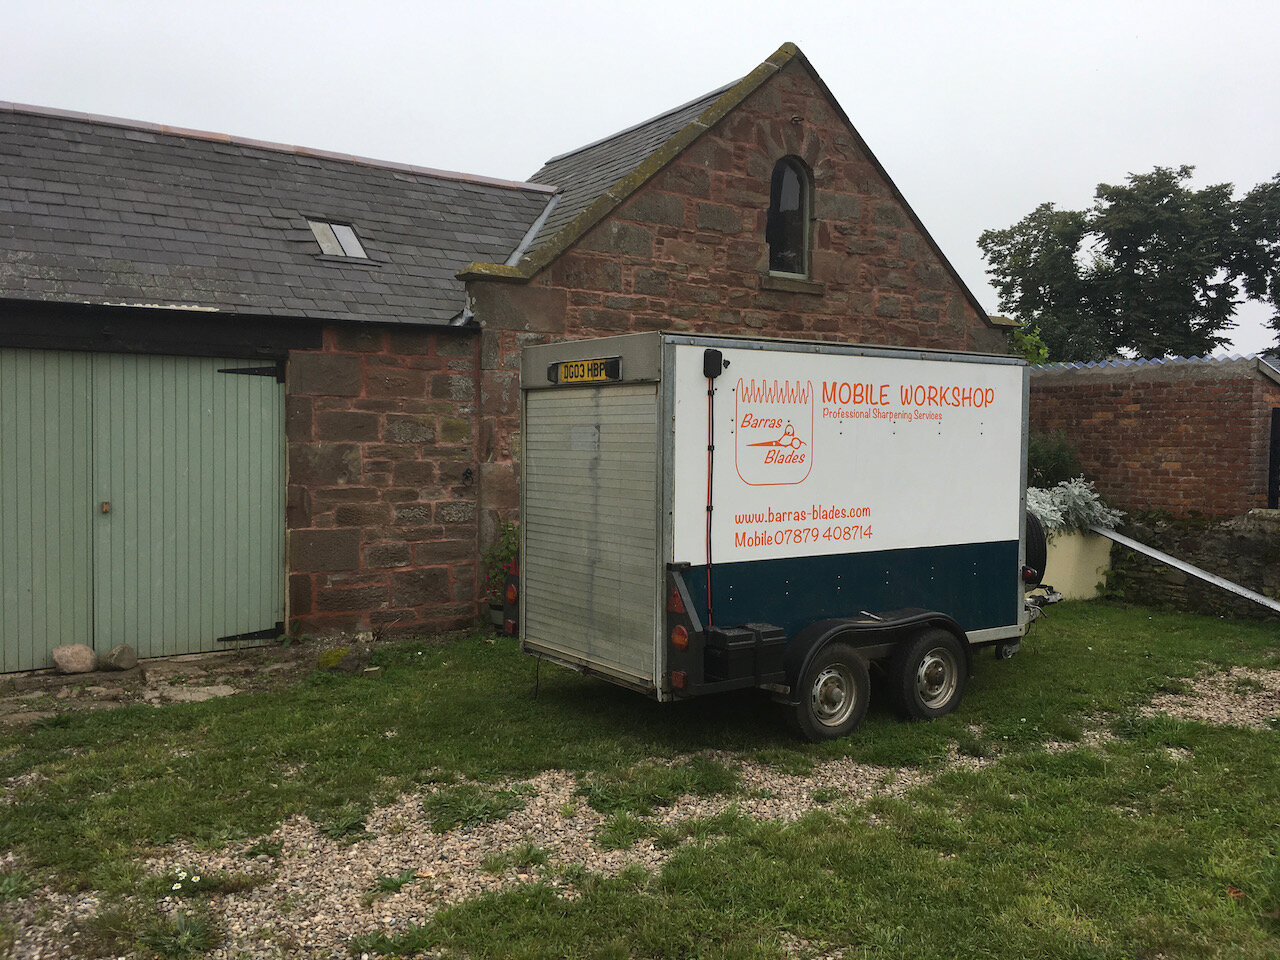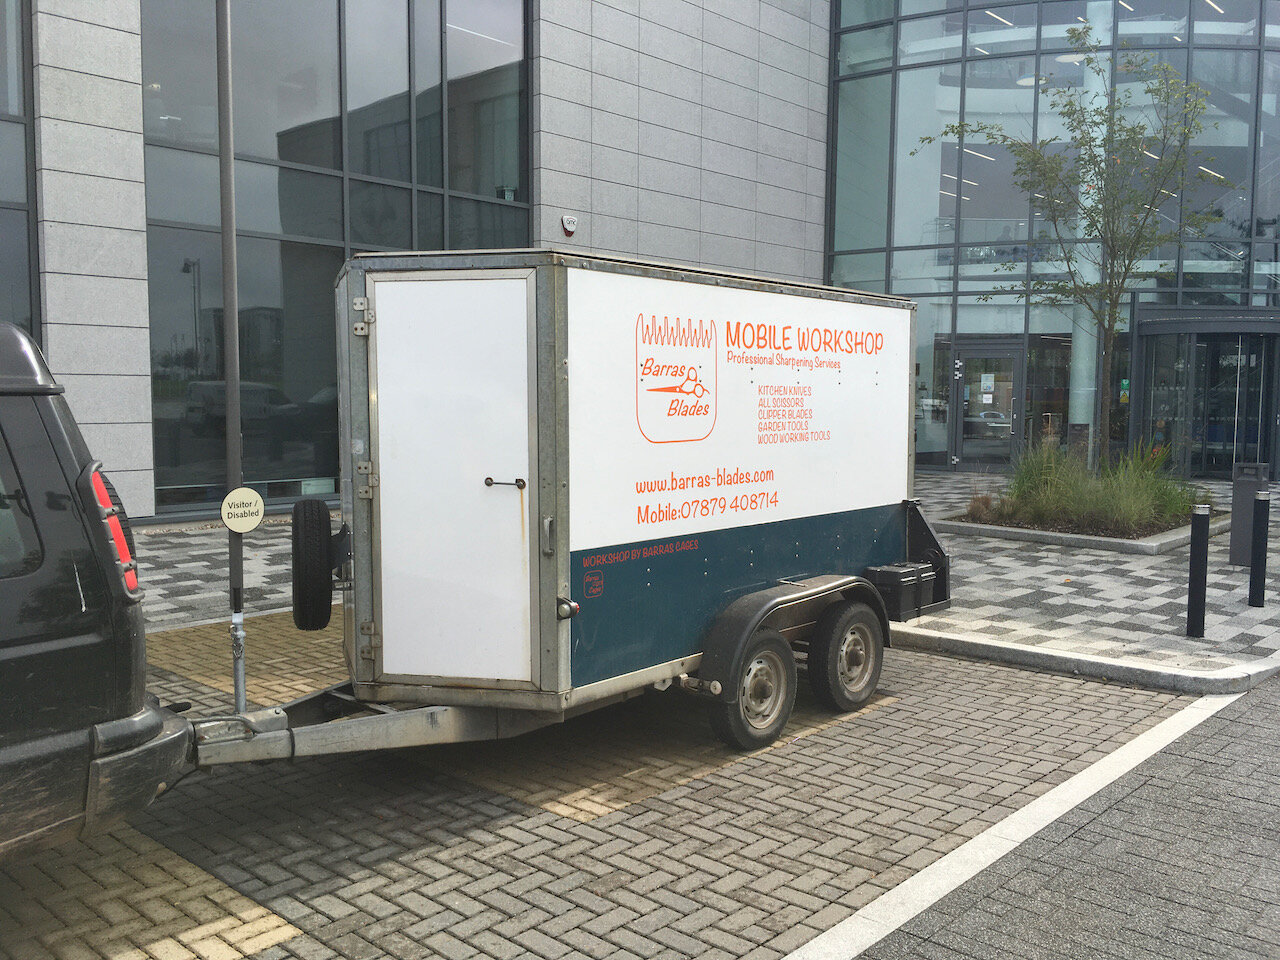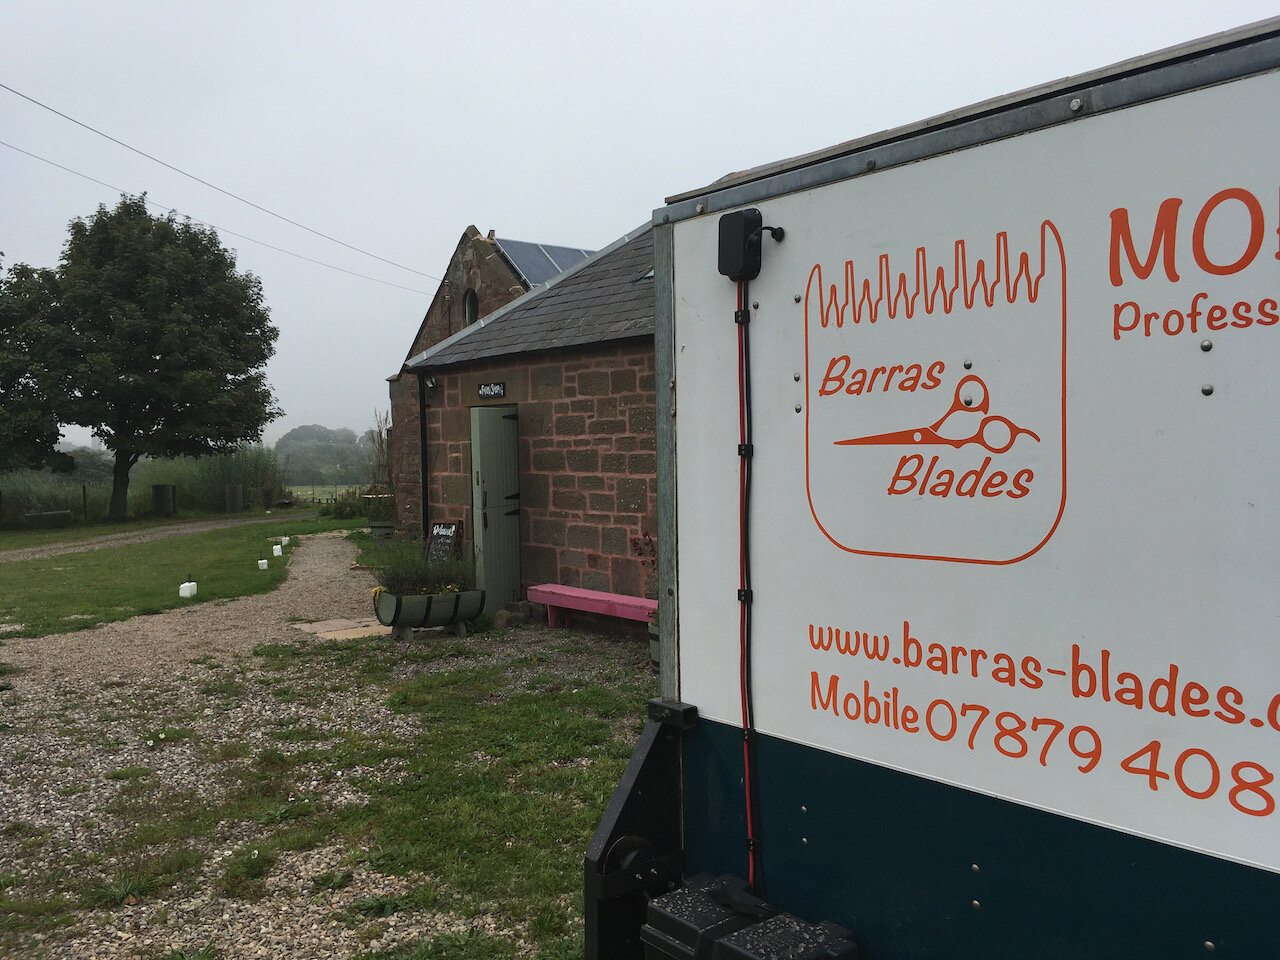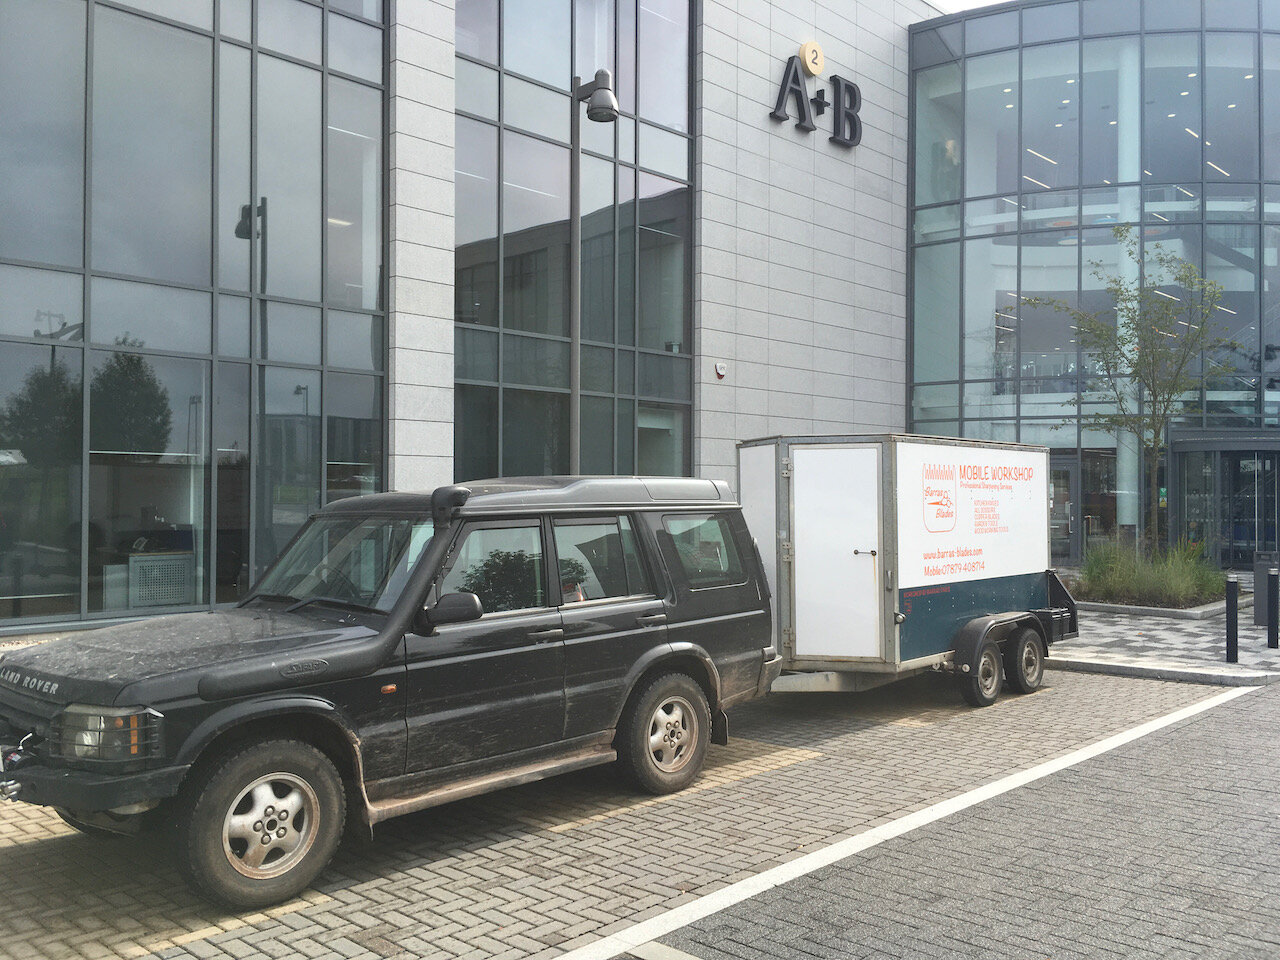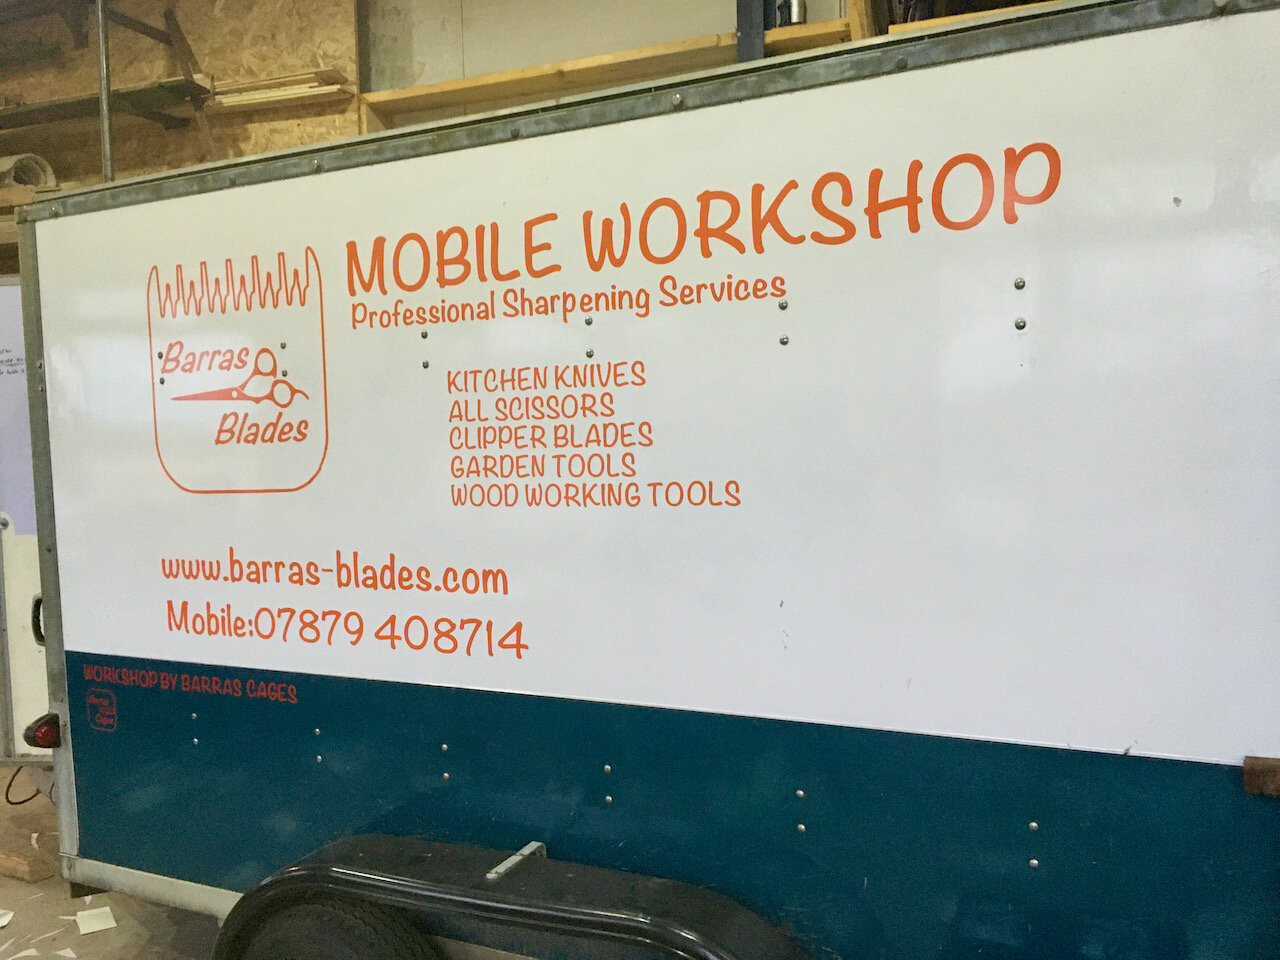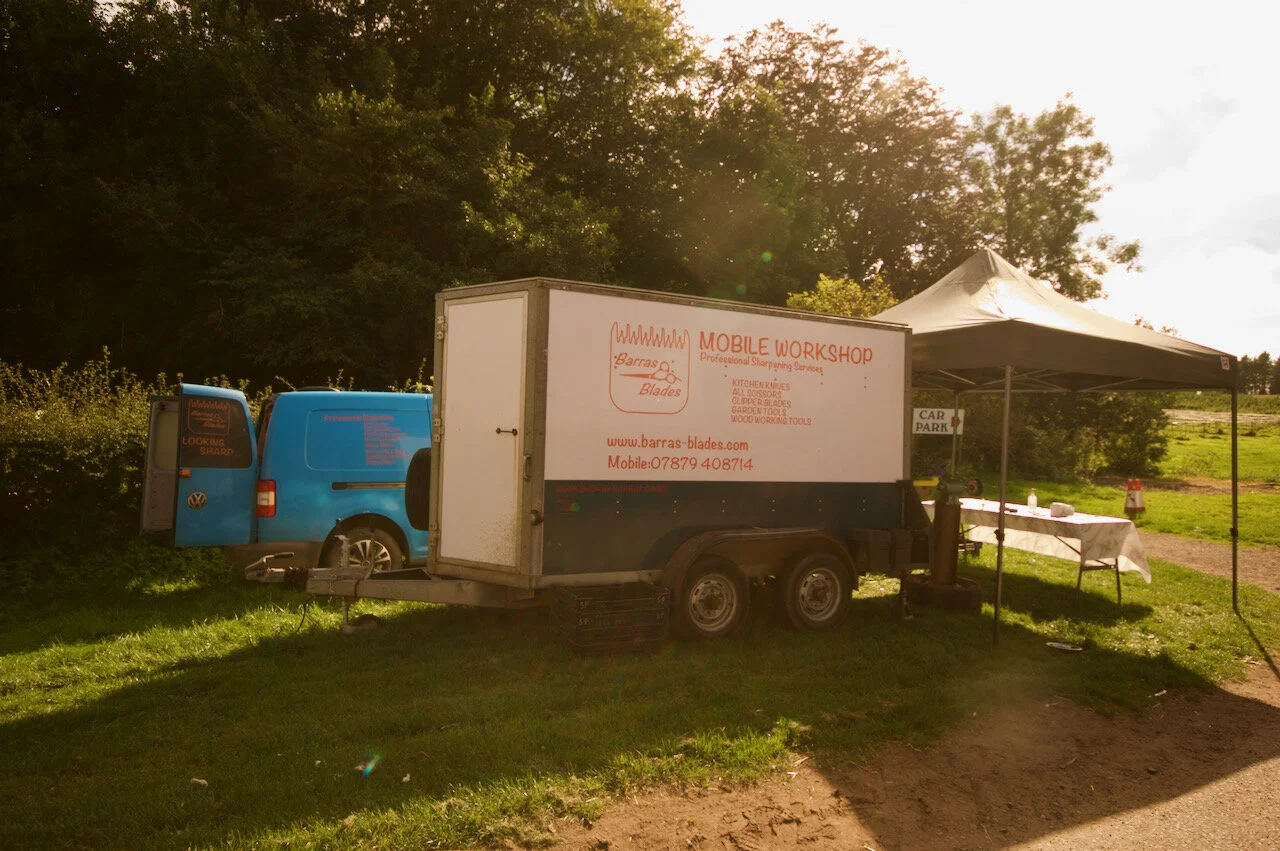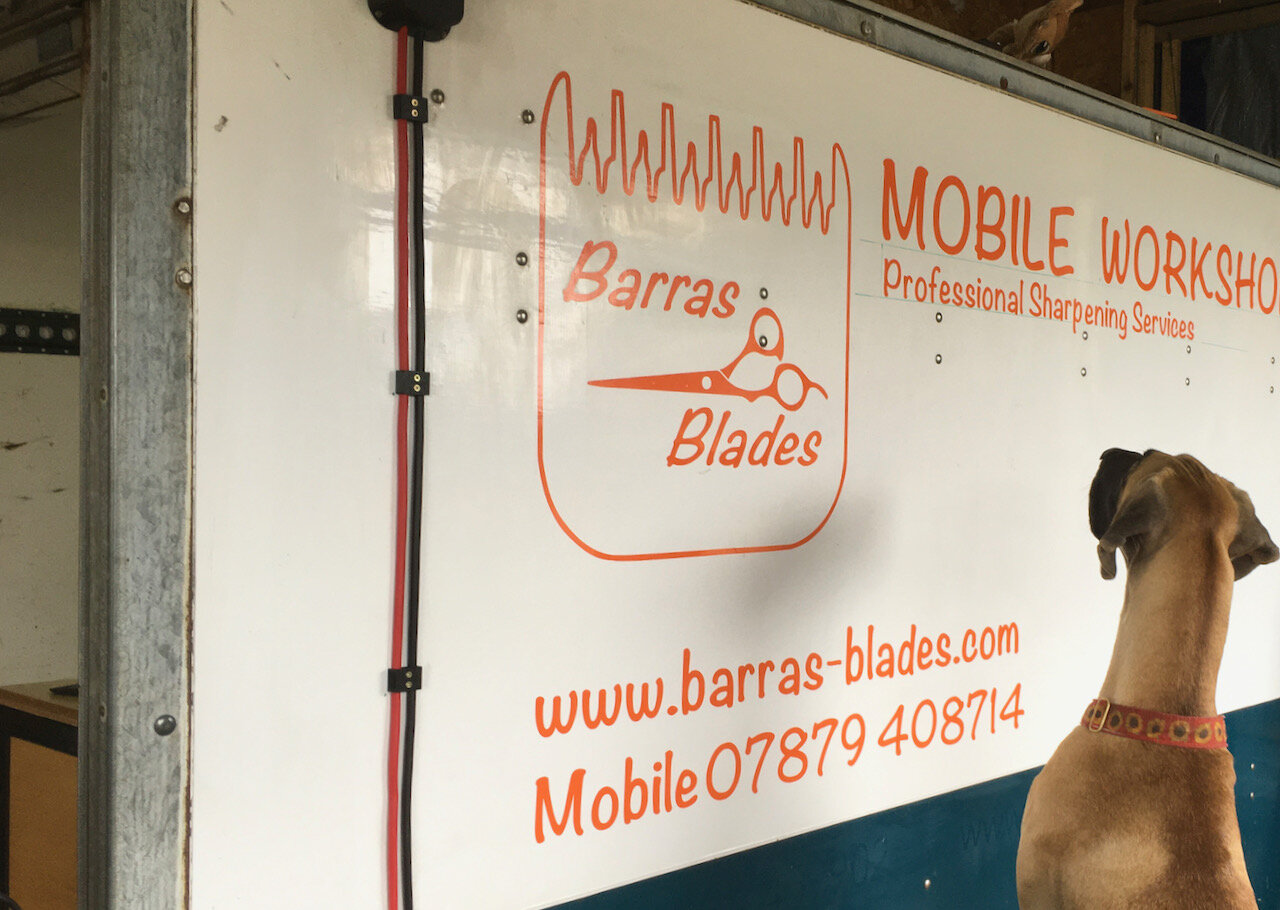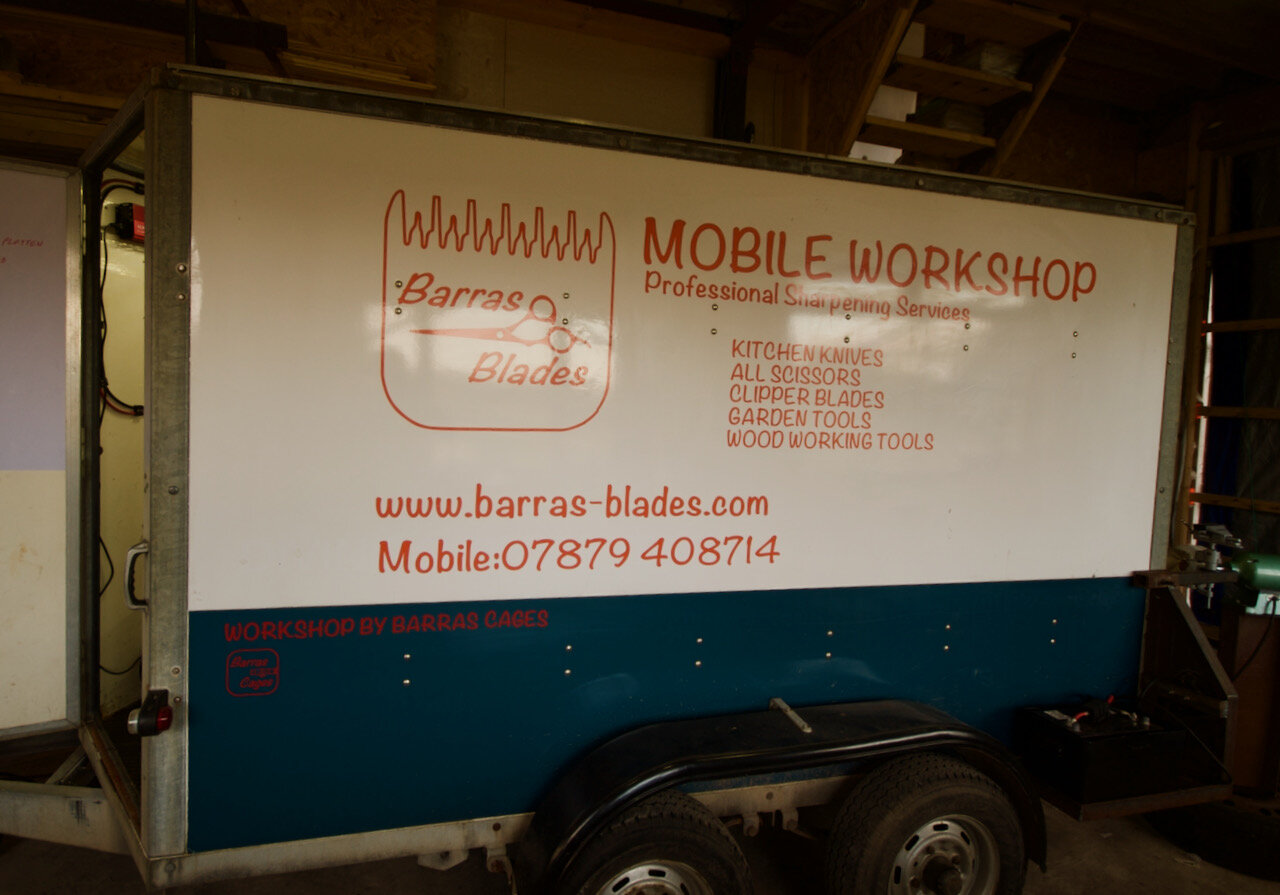
The Mobile workshop
The mobile workshop lets barras blades come to you. There’s a few parts to the mobile workshop story and capabilities
How the mobile workshop came into being
The mechanical and electrical build
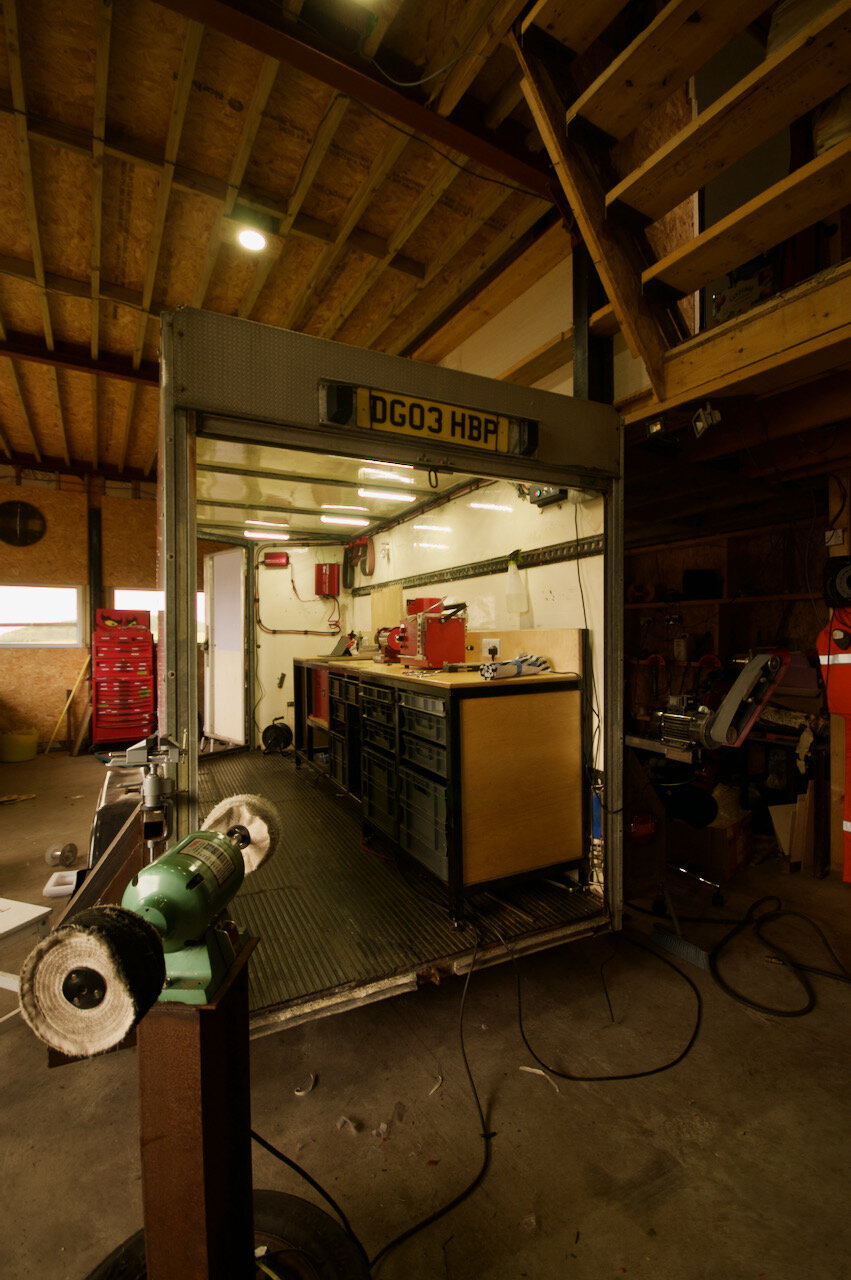
A brief tour showing what equipment is carried
A gallery of pictures of the build and in use
As this is a constantly evolving piece of equipment I am going to update this page as this change so this page is at it is just now in early October 2021 earlier versions of this page are archived here
The Story
It had always been in the plan to take barras blades on the road so that we could attend primarily dog shows which we goto anyway showing our dogs. It would also let us run popup sharpening events as well as attend farmers markets. I never quite decided if a van or a trailer would be the ideal solution. Both had their upsides and downsides. Thought as it was a problem in the future I felt it would find its own solution in its own good time.
As we got to know more and more customers the name Giltsharp kept on appearing who used to offer mobile knife sharpening in Aberdeen. Since they retired no one had stepped in to fill that void. This accelerated our plans for a mobile solution. What was also happening at this time in 2021 was the price of 2nd hand vans had basically got silly and new ones aren’t available and are out of our budget.
Then the hand of fate stepped in and I spotted on the local market a slightly grotty looking Ifor Williams box trailer.

Ifor williams box trailer just after purchase with the trusty landrover Discovery towcar
The Build
For those that have been paying attention you will have seen that Barras Blades does not exist purely as a sharpening company. There is Barras Cages which is a small fabrication operation which does cages for dog vans and other small light fabrication jobs. Both of these are built upon my engineering skills.
I do like a nice engineering challenge to get stuck into and this was no exception. This does mean that quite often i neglect the social media thing of taking pictures so you’ll have to use your imagination occasionally.
The job was to take a slightly tatty trailer and turn it into fully operational and self sustaining mini workshop. It can’t be that hard as many sharpeners run out of garden sheds or mobile vans. Those that run in a van have an inverter installed so they can take the 12v from the van and use it to run the 240V tools needed for sharpening.
The Job could be split into
Trailer inspect and repair
Inspection and repair
I noted one or two minor issues with the trailer when I first purchased it. It looked pretty dirty and it still had the decals from the dive support company who had owned it. However the dive support company must of spent some cash on it as looking underneath showed all new brakes which is bonus. Stripping off the decals revealed a nice vinyl wrap on the outside which was perfect for applying new graphics to. Overall it was in much better condition than I thought.
The only real issues were
Jockey wheel bent like a banana
Fix = Bought a new one
Some of the lights didn’t work
Fix = 30 minutes of work inside the terminal box
Poorly installed tail lights
Fix = More details below
No Fog lights
Fix = More details below
Front door missing the external handle
Fix = not yet
Rear door frame cracked in the top corners
Fix = Clean up and reweld as well as fit strengthening gussets
None of the above was a major issue and most of it I never got round to taking a picture
The mechanical fitout
It had always been part of the plan to go mobile from day 1 just I never knew when. This did not mean that I couldn’t plan ahead and I had as i had built a set of benches that could be pressed into service in a mobile workshop. The start of them can be seen here, a bit more progress here with the final build here. These benches hold the clipper sharpening machine as well as having electrical sockets built into the back of them. the drawers are Euro stacking crates which are very useful. A bit more about them here
A quick try and the benches basically fit which is good news

The first fitment
The first trial fitment of the benches and they fit. This is them pushed all the way forward which left about a foot at the rear of dead space.
You can see the badly fitted tail lights also in this image. There should also be a fog light below the tail light on one side.

View from the front
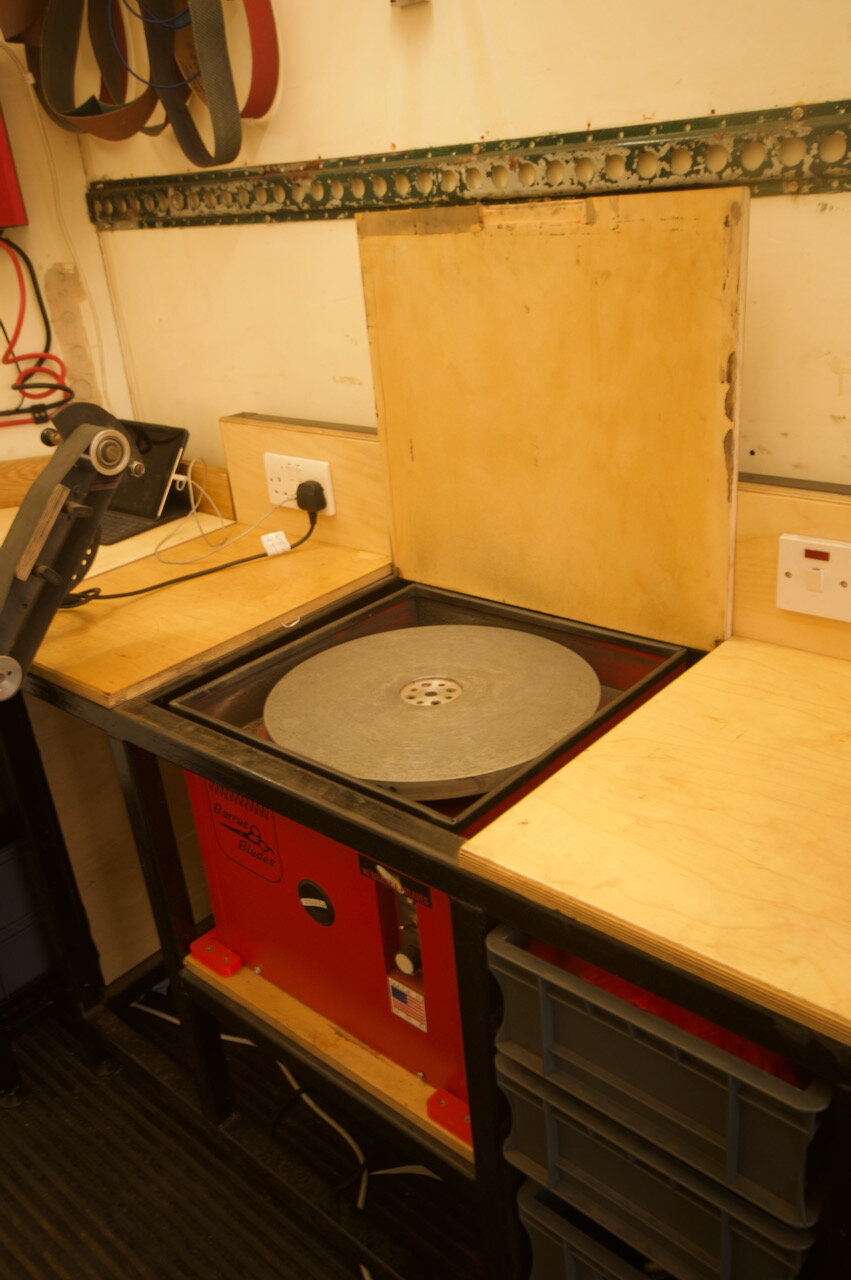
The benches in with no drawers. You can see the big red clipper machine built into the far away bench
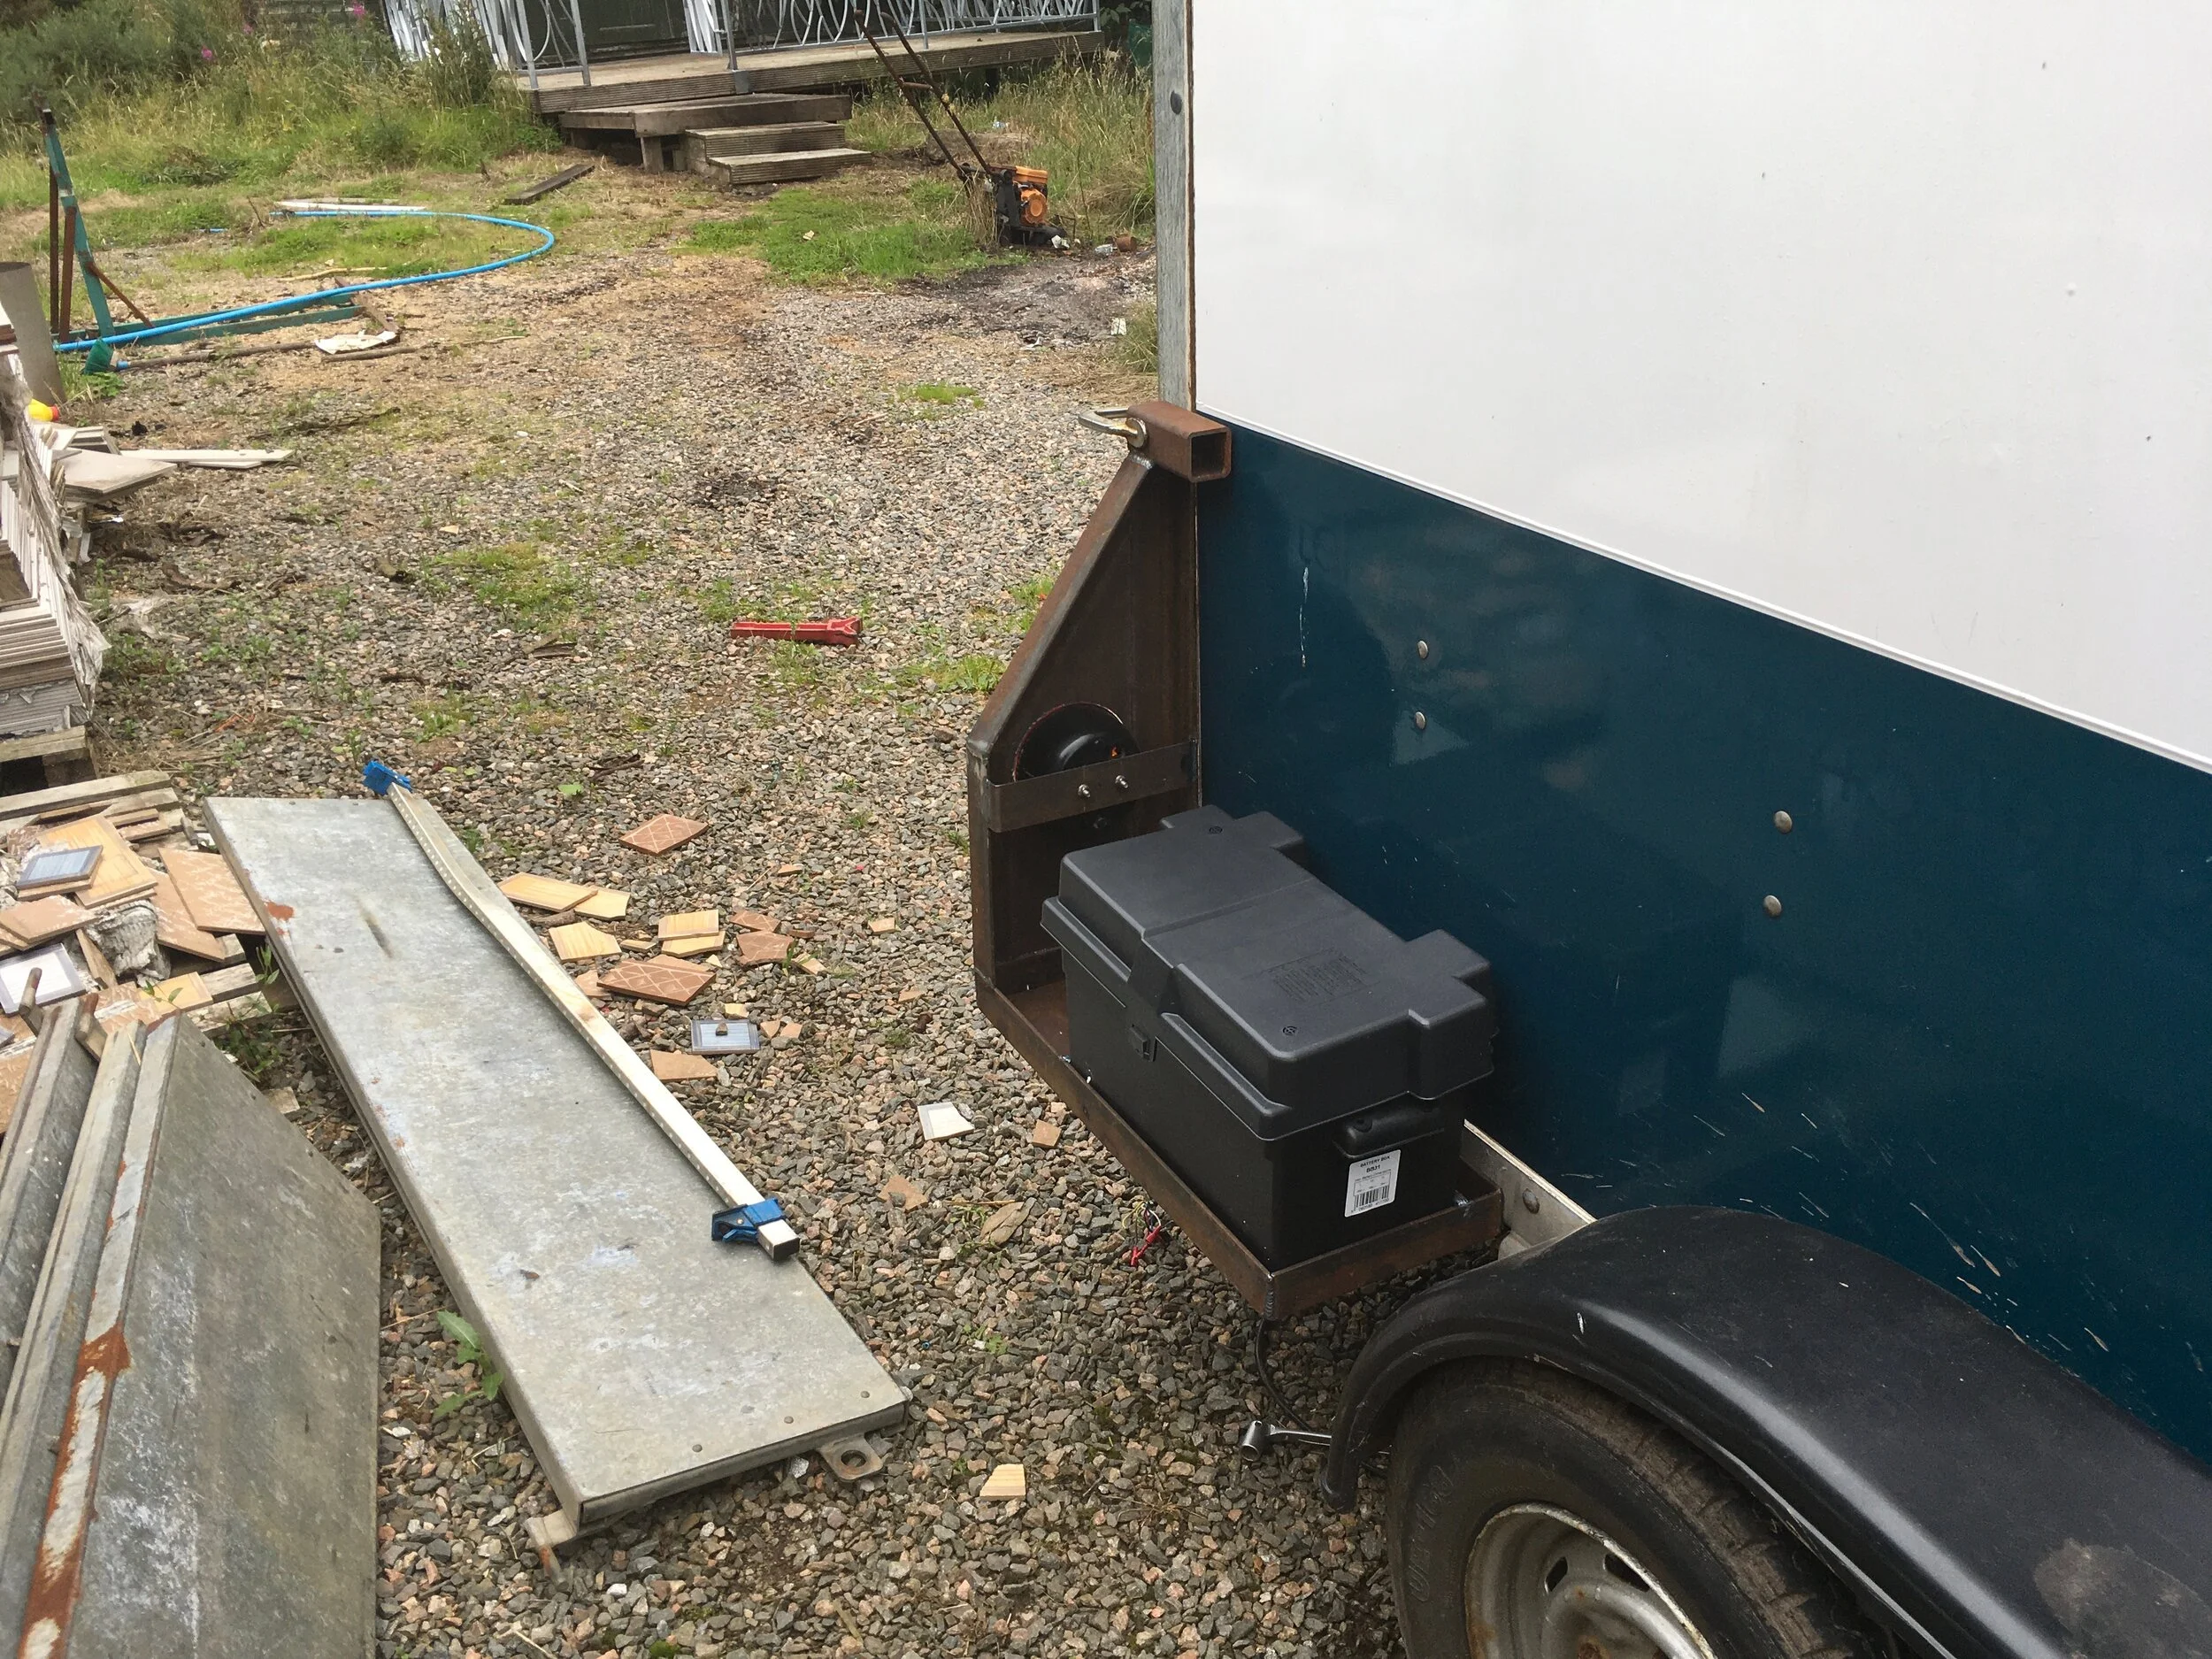
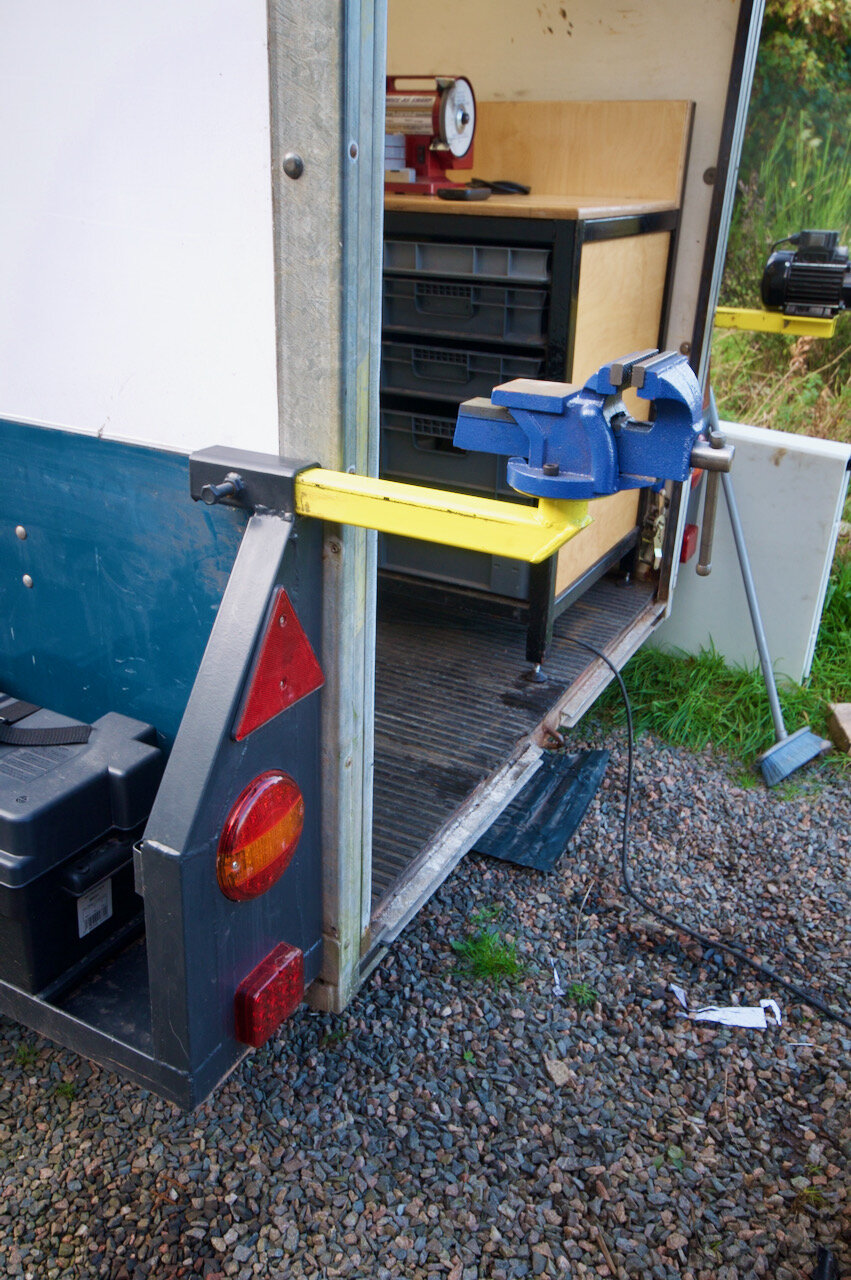
At this point I have a damn good base and I could use it as is. I felt there was room for a great deal of improvement. One of the larger issues facing me was where to stick two large leisure batteries which would be needed for running the inverter. Space inside was limited so outside made the most sense. With this style of box trailer the wheels stick out of the side and are covered by a big mudguard. This leaves a space behind the rear wheels and infront of the brackets for the tail lights.
An ideal place to fit in a battery on either side. It also meant I could bin the terribly fitted rear lights as well as gain room for a fog light.
In the background to this I have also been building a 2 x 72 grinder which uses a combination of 50mm and 40mm tubes to hold the work platform. If you get 50mm tube with 5mm wall this gives an internal size of 40mm.
Video over there>>>
As a joke the designer of the grinder posted a joke picture of him having a vice mounted into the grinder. This gave me an idea.
One of my concerns about operating in a small space is the amount of dust and grime produced by some of the machines. A dust extractor isn’t practical due to space and power concerns. However working outside solves alot of the problems with dust and grime. Working outside also allows me to talk to customers etc, during farmers markets.
Seeing that I was building some nice strong frames for holding the batteries why not install a piece of 50mm tube into them.

Battery mount from rear
In this view you can see 50mm tube at the top with a piece of 40mm tube inserted. It is held in-place with a pinch bolt. Secured to the 40mm is one of lidil finest £6.99 mini vice
Below that you can see one of the original tail lights now recessed so that just the lense is visible. Above it is loads of room for the reflector and below it there is enough space to have the fog light which should be 100mm distant
Just behind the wheel you can see a slot for the battery cables and the frame to hold the battery box

Battery mount from ahead
From this side you can see basically the same as above.
You can see the back of the light which needs a bracket to get the lense to just project enough.
The 50mm tube hasn’t had it pinch bolt added
You can also see one of the battery boxes which will house the leisure batteries
Completed item
Of course forgetting to picture a few steps along the way the corners are back from the powder coaters and are installed.
You can see the fog light at the bottom and the reflector.
In the 50mm tube on this side you can see a light duty vice. On the far side you can see the sorby belt grinder.
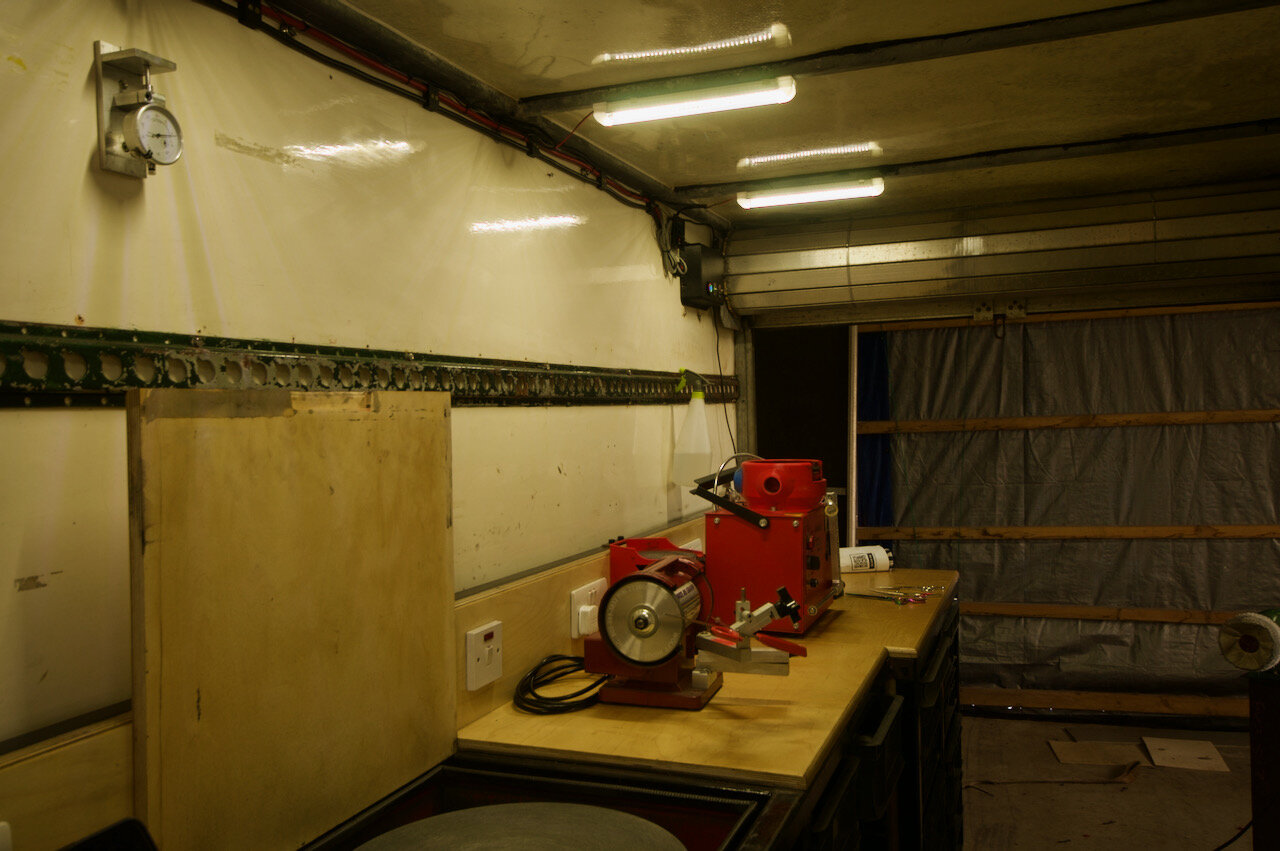
From the above picture you will also see the benches are placed further back in the tailer. This means i now have a space of about a foot to the front of the benches and due the front of the trailer being tapers this means i have a wedge shaped gap. After an early outing at Sillyflatts it became pretty obvious that having the Sorby which is used for knife sharpening outside might not be the wisest of ideas in Scotland, in winter. Also the vice was rattling around on the floor when in transport. So a rough sketch was made for an additional bench. This would use the same 50mm tube system and would fill in the corner. Did I take any pictures of the build process?. Of course not.

PLACEHOLDER PICTURE
A shot of the table with the top removed.
Here you can see the two 50mm tubes which let the vice and the Sorby sit into in a nice working position

This is the table in normal operation with the vice in the normal position for a vice and the sorby is just infront of the other table.
It also gives a nice corner for charging the iPad and the end socket has a USB charging socket built in

This is the sorby and the vice at the limit of the travel.
This is purely for this picture.
It does show the cutout in the bench topthat allows the vice to sit in a more normal position
The power system
This has the potential to be deeply boring or deeply useful as this will be written with links to what I bought and why. Seeing I have no control over e-bay etc expect numerous dead links.
For sharpening most of the tools and equipment I use needs 240v electricity. In the workshop that was easy as I just used a 3 pin plug. On the road this would be a bit more of a challenge.
3 ways I could get around this
Plug into a power socket where ever I went
Not really practical especially when I can’t get parked near the customer
Generator
Works anywhere and has within reason unlimited run time but noisy and messy
Batteries and an inverter
Works anywhere and is virtually silent in use. The downside is limited run time.
I decided that despite having a generator I could use that the battery and inverter route was the best.
For a battery bank and inverter you have two things to consider. The amount of power you need to run tools and the amount of energy you have to use. Confusingly enough these two things are measured in similar units and two different ways of measuring them. Think of it like pushing something. Power is the how hard you have to push and energy is how far you have to push for. You can push a small thing a long distance or you can push a heavy thing a short distance.
To work this out I bought a cheap and cheerful plug in power monitor from this I saw the most power I was pulling was about 350watts (0.35 kilowatt)and a typical day in the workshop was using less than a 1 kilowatt hour. A kilowatt hour being 1kw for an hour.
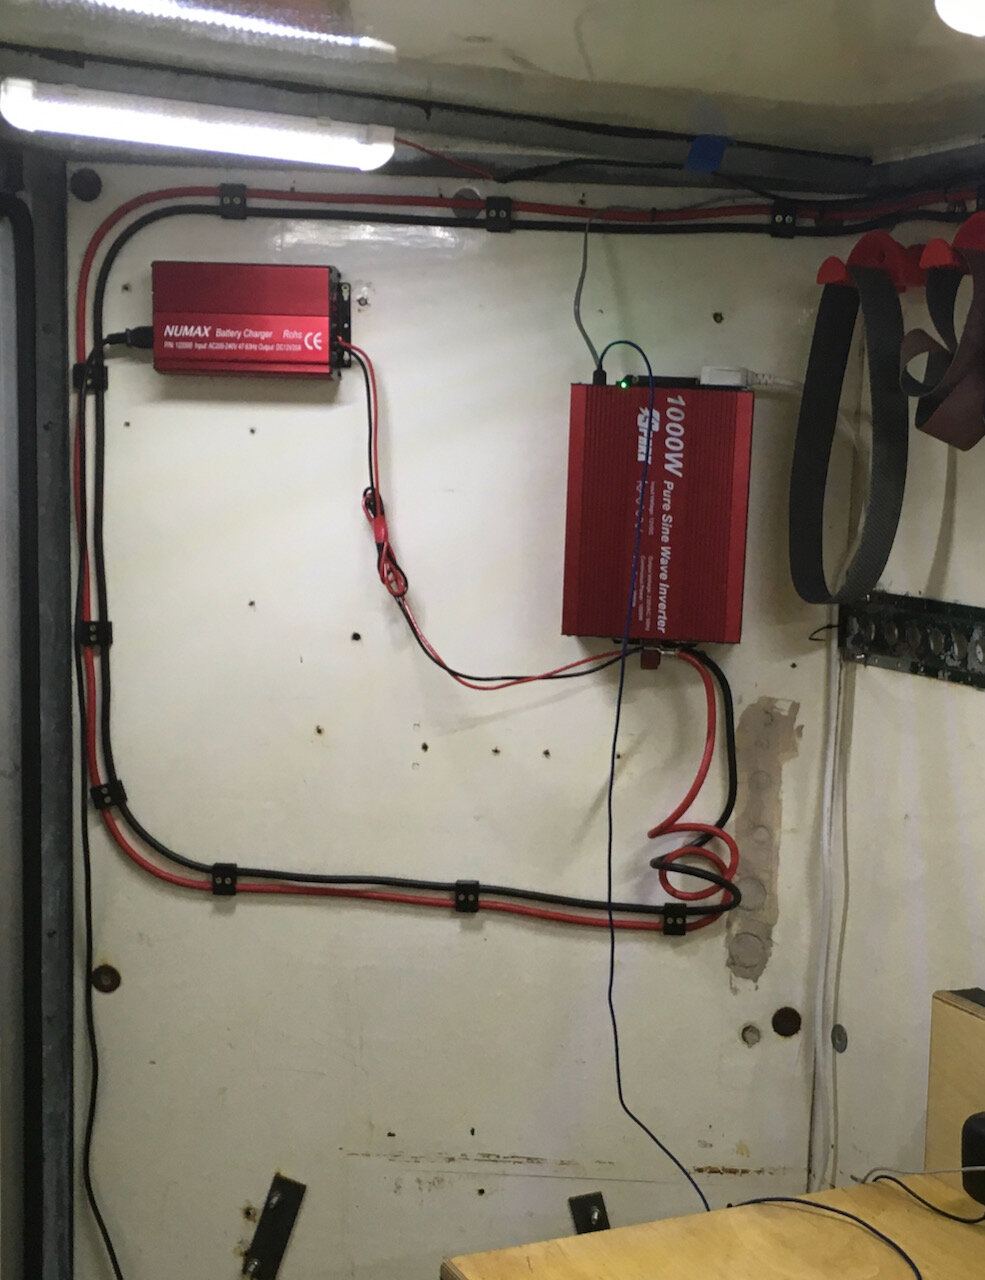
Inverter
There is two basic types of inverters you can buy. There is the cheap and nasty modified sine wave inverters which have poor starting current and motors running off them sound terrible. Also machines with speed controllers inside really aren’t happy with them. So a pure sine wave one was the answer. The choice was now how big and quality or cheapo. On size i had never seen a demand about 350 watt while running but i knew that start up currents would be larger. This pushed me towards 1000w as most inverters can actually supply double their rated capacity which is more than enough. For quality or cheapo i would prefer a quality one but the bank balance said a cheapo. So a spark 1000w one was chosen from ebay.
Battery bank
Without disappearing down a deep and dark rabbit hole I shall try and keep this brief. There is a few basic things that need to be considered for a battery bank
Capacity
This is the rated capacity of the battery bank which can be measured in amp hours (aH) or kilowatt hours (kwH). Of course these two figures while related there is no direct comparison as power = amps X voltage. Which means for a constant amps if your voltage drops you end up with a lower wattage. When any battery discharges the voltage decreases this means you can’t accurately work out the kwH figure from the amp hour figure. This is a problem as the power consumption of the tools has been measured so far in watts. By taking a nominal voltage of 12.3V you can get a reasonable guess using this site here
For further fun different battery chemistries influence alter how munch energy you can pull from a battery before you start to damage the battery. A lead acid for example can only give 50% before is starts to damage the cells.
Chemistry
This is where i shall follow the lead of flatearthers all around the world and say “Do your own research”
In this case it boils down to two different choices.
Lead acid which is cheap cheerful and has been here since the beginning of time. But also very heavy and a not a great performer
lithium iron phosphate (liFePo) which are very expensive, light, brilliant performers and not quite as burny as conventional lithium phosphate batteries
Want to learn more then there is a video to watch>>>>
Voltage
Another factor to consider for batteries is the voltage. This relates more to cabling as because as your voltage goes down your amperage goes up to get the same power. This means the higher the better. However its not that simple as higher voltages can bring higher costs and more difficulty in sourcing parts. For example an inverter which runs off 12V is massively common as 12V is the normal voltage for cars and motorhomes. Jump up to 24V and it is mostly trucks so there is fewer inverters. Jump up again to 48v and you are into specialist inverters for offgrid power supplies.
Conclusion
In an ideal world I would go for a 24V battery bank of LiFePo cells but that smashes the budget out of the park. So its back to lead acid which are cheap to buy but have the potential to have higher lifetime costs. Next there is 24V or 12V. The trailer is towed by the discovery which is 12V so 12v it is.
I found a special offer online where you could get two off 120aH batteries which is here
These two batteries together gives me 240aH of capacity but being a lead acid then you can only use 50% so thats 120aH which is about 1.4kwH assuming an average load of 350w that gives me just over 4 hours none stop.
Click pic to get full spec
Charging
Of course with a battery bank you need to get energy into the batteries
Three basic ways this can be done.
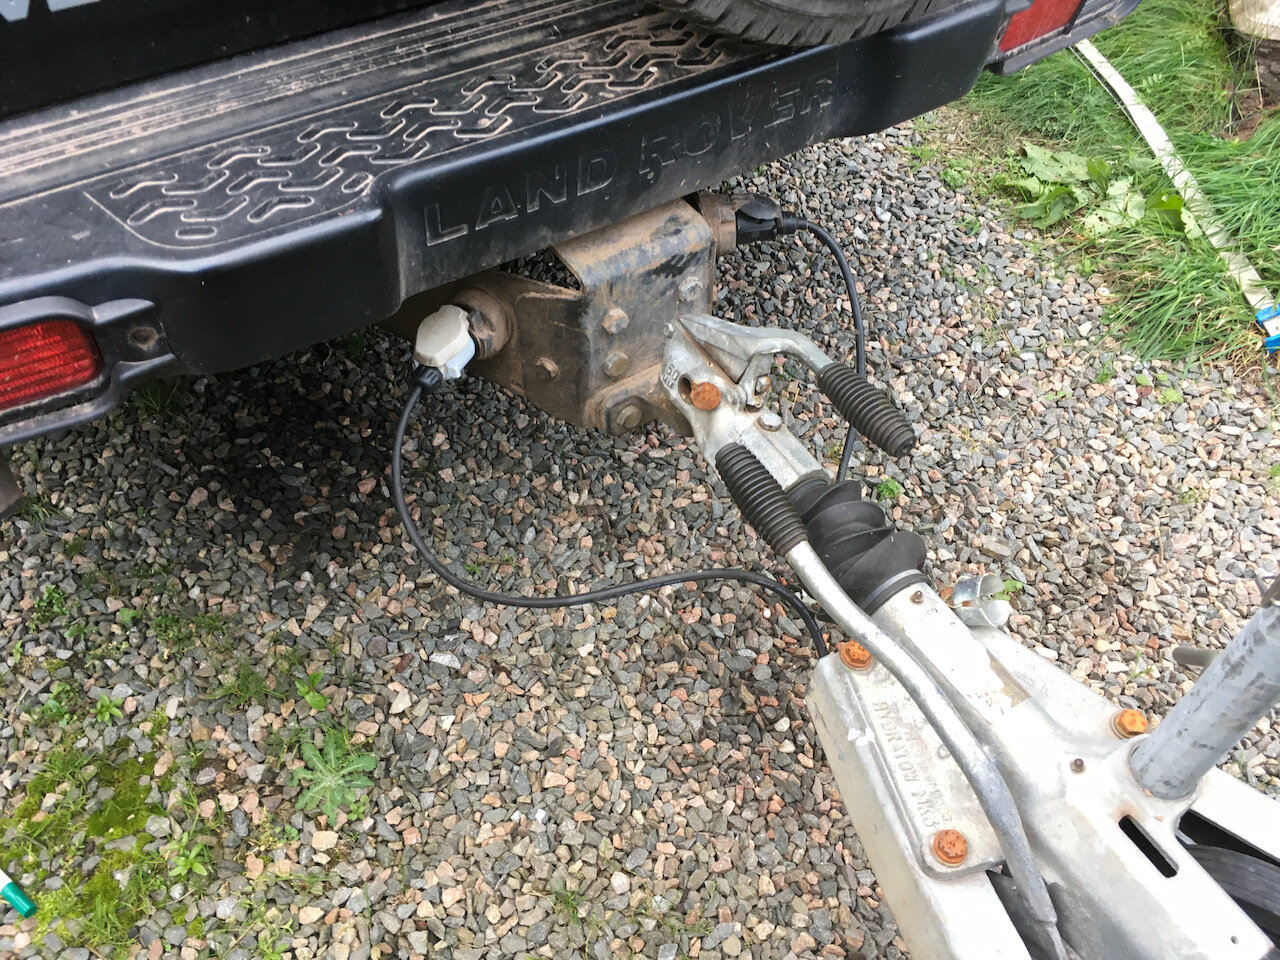
The first way is by using the caravan charging socket on the back of the tow vehicle. This has the upside of being nice and easy as you just leave the grey plug attached to the tow vehicle. The downside is that with lots of short runs and long days working then it won’t keep up the batteries being discharged. The charging socket is limited to about 10amps and that would take 12 hours to recharge from flat. Seeing that I plan on going no further than an hour from home that ain’t going to work.
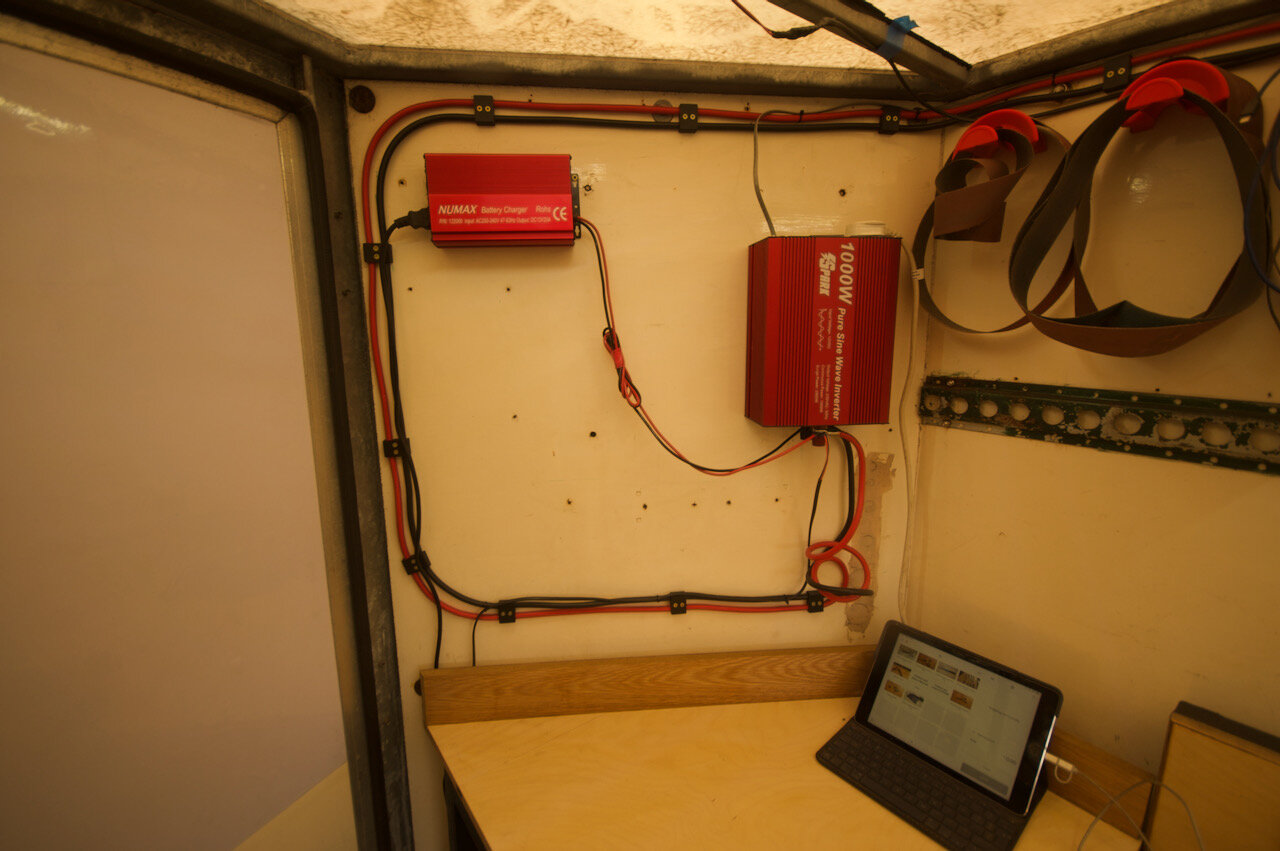
It is however a useful back up. To install it I simply ran a cable from the two terminals on the inverter via a small volt/ammeter in a 3D printed housing terminating in a grey 7pin plug.
3D printed housing for the volt/ammeter

The second way is using a large charger when back at base. The upside of this is that it can be done overnight but the downside it needs me to remember to plug it in. The one I selected after the exhaustive process of seeing what the shop I bought the batteries from had in stock. This turned out to be a NUMAX 1222000HD this gives 20amps at full rate. Assuming the batteries are down to full empty then that is 6 hours to recharge which is perfect for an overnight charge. This is a nice little unit as it maintains a float charge once the batteries are fully charged. It also has a nice feature that it will give an amp hour reading which lets me see how much power I have used.
The final option is solar. The upside of this is that it is free to run and it needs zero involvement as you just have to park in the sun. The downside is you have to park it in the sun. I am in northern scotland. The budget at this point does not allow for solar but it is part of the plan.
The final part of the power system is the cabling. This is often underlooked in both the way of budget and sizing. As the voltage goes down the amps go up to supply the same amount of power. Looking at this online calculator based on 2000w at 12 see’s a peak amps of 165 which is 12.5 times the max amps of a household socket. To deal with this you need big cables. This page is useful in working out how big your cables should be.
Other factors to remember is that a lead acid battery can happily pump out hundreds of amps which will cause a fire so you must protect your cables with a fuse. I selected a mega fuse at 175amps for each battery. More than enough to supply the inverter at peak load but still low enough to pop should a short develop.
I have also installed an isolator on the positive lead going into the trailer so that I can isolate everything from outside of the trailer.

External cable run
This is the cabling running up the outside of the trailer. Behind the 3D printed cover is two bulkhead connectors which allow you to go through a bulkhead without having an unsealed hole
The little black things are 3D printed cable clips

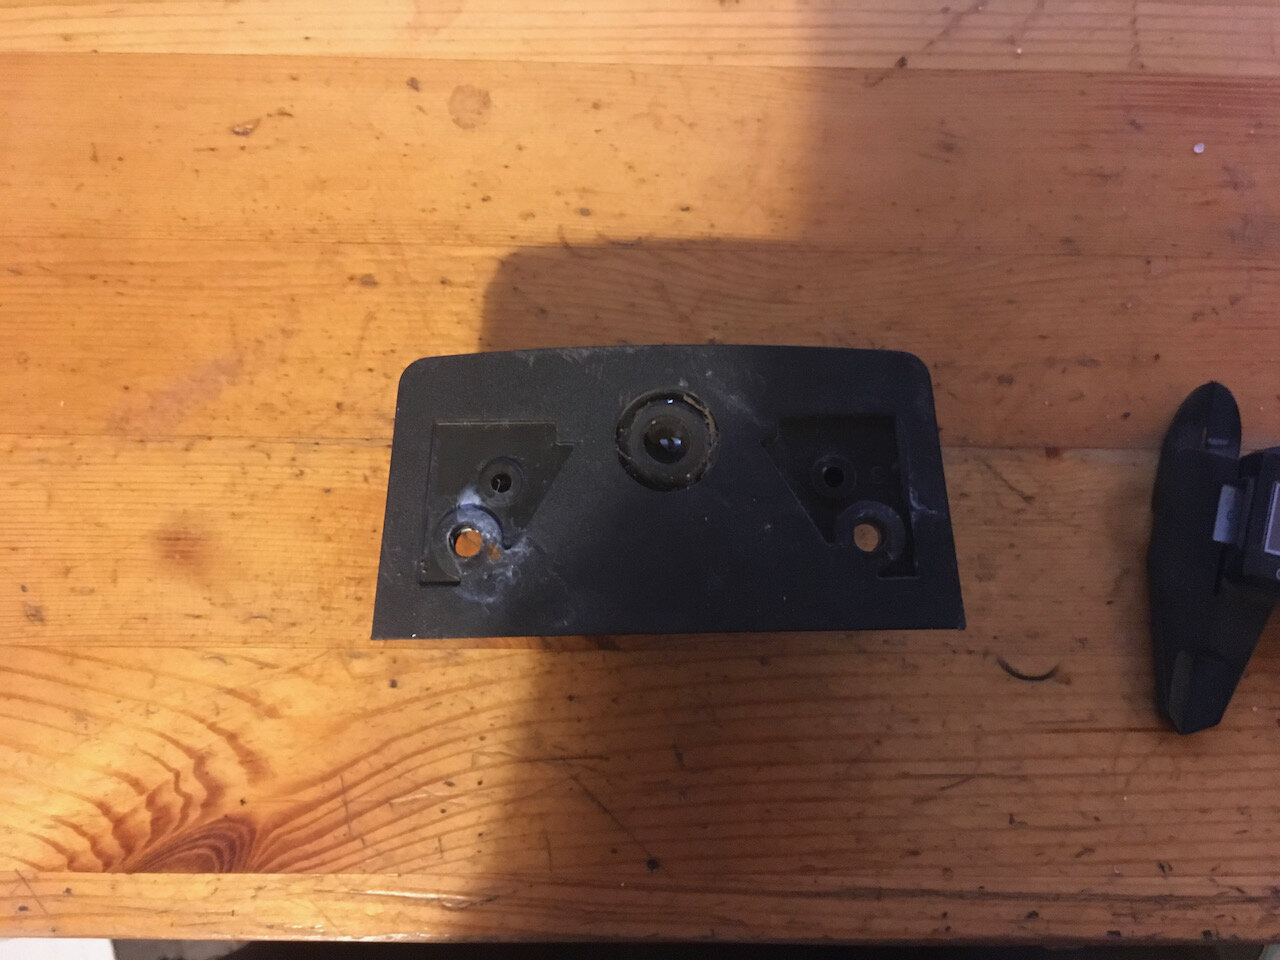
Behind the panel
A picture taken for designing the 3D printed cover which is why there is two dots 200mm apart.
The round thing to the left is the back of the isolator.
The two bolts to the right are the positive and negative feeds coming through.
The green lines are the rough idea of where the cabling will go.
The wire is completely temporary

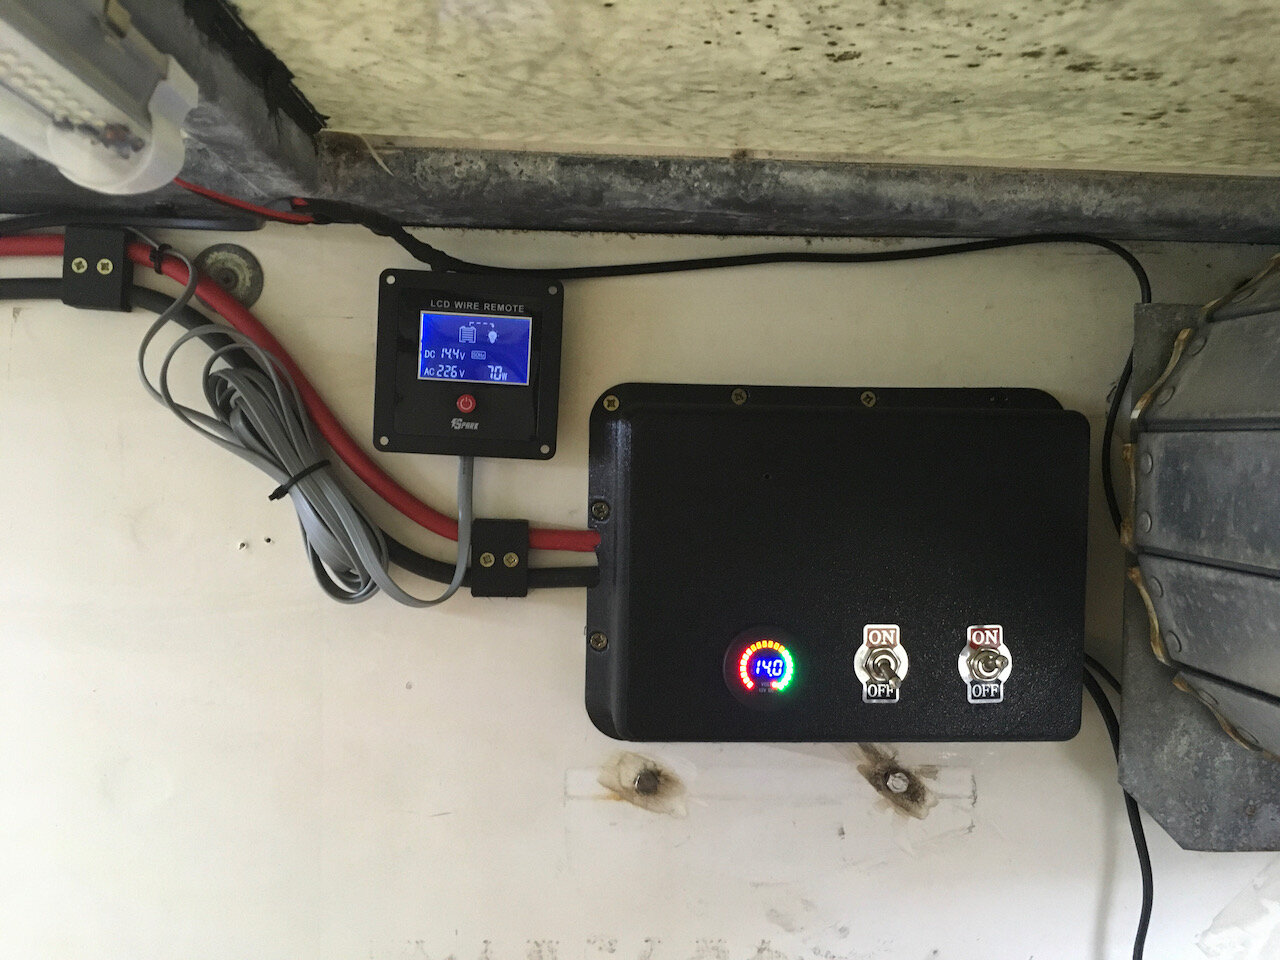
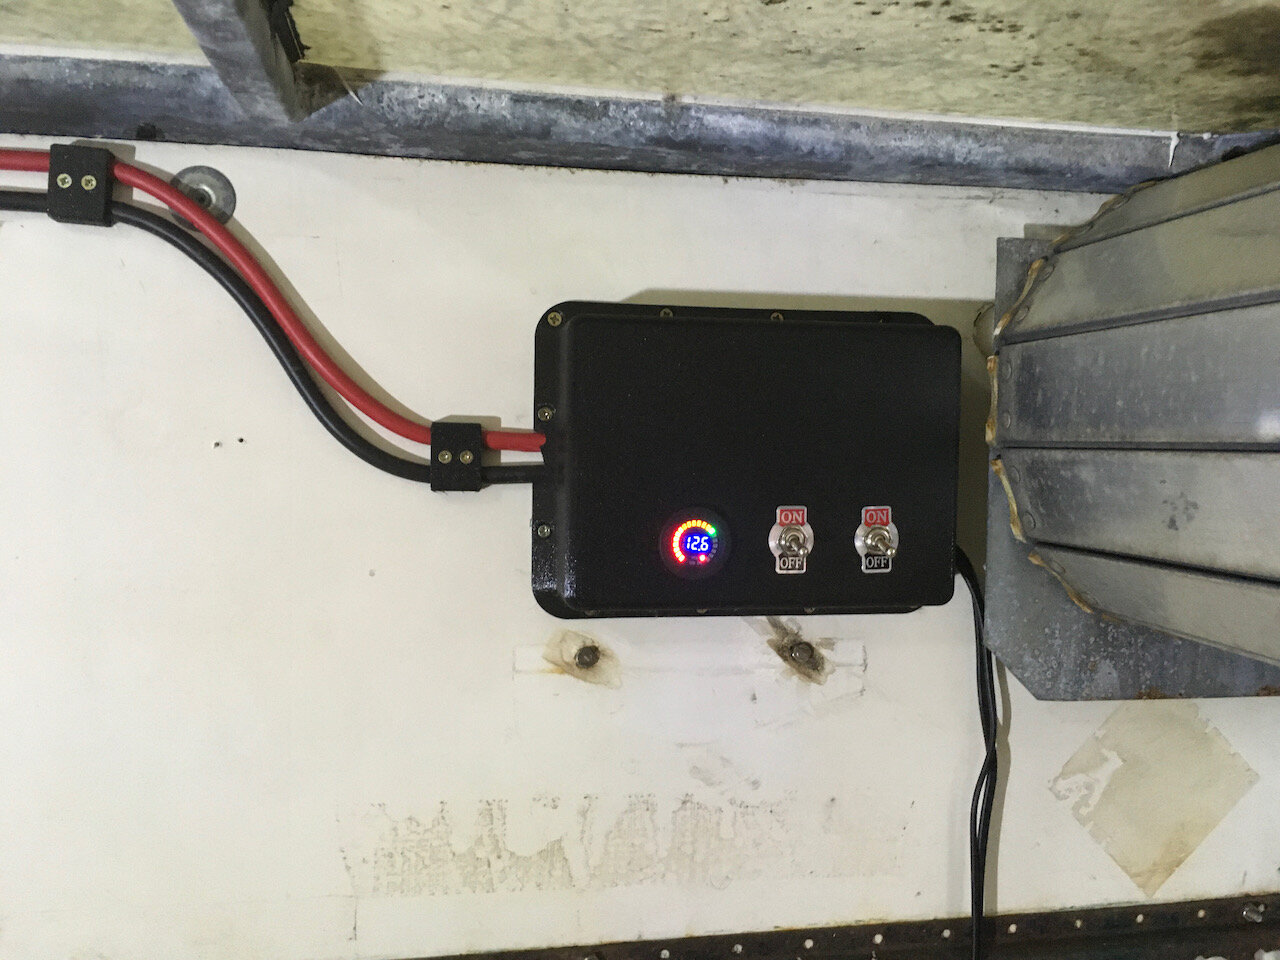
3D printed internal panel
This is the cover over the terminals in the picture above.
The two switches are for internal and external lights.
The volt meter gives me a good guide as to battery state
The small LCD panel is the remote for inverter. this will be combined into the 3D printed panel in the next iteration
That is the build so far but there is still room for improvement and major items on the todo are as follows
Install a heating system (DONE)
Install a set of prop-stands for the rear of the trailer
Install a small workbench for the TAS and a buffer
Install external lights
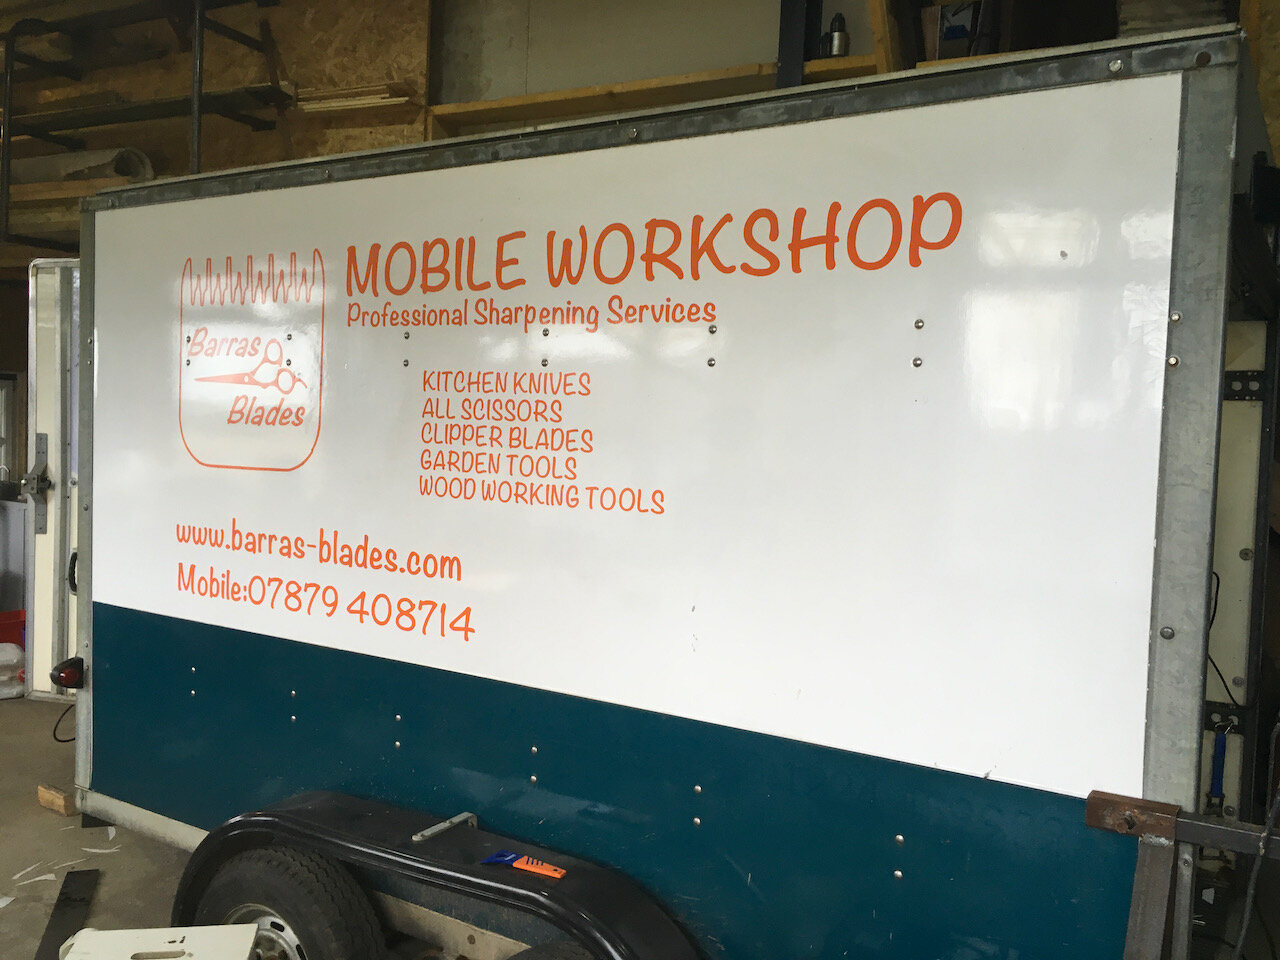
The capabilities
The mobile workshop carries basically all the tools needed to sharpen almost anything I will encounter in day to day sharpening.
This includes
Kitchen and chef knives
Household and industrial scissors
Hairdressing and grooming scissors
Clipper blades
Mostly horse (A2) and dog clipper blades (A5)
Wood working chisels
Garden tools
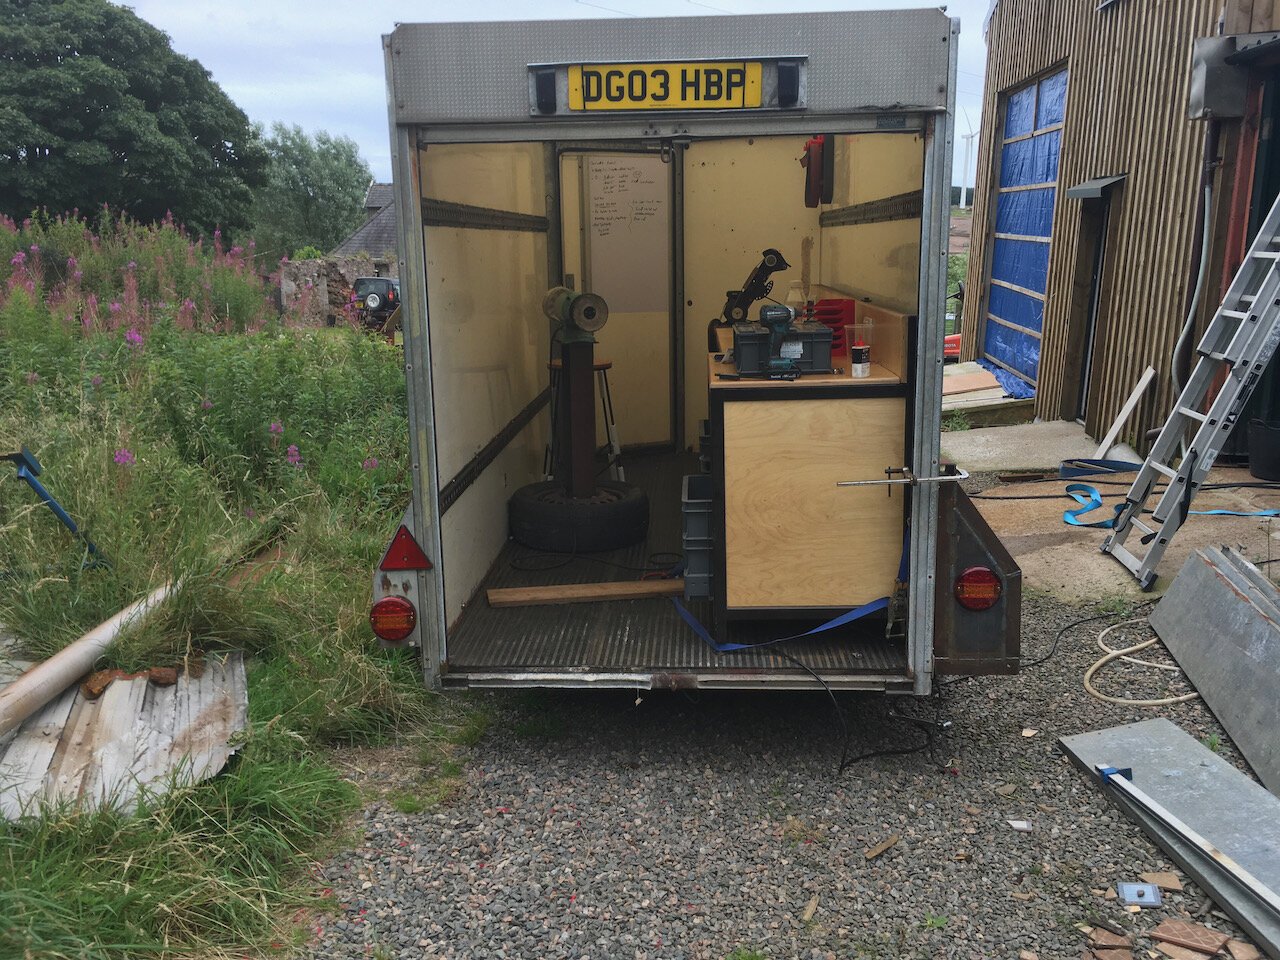
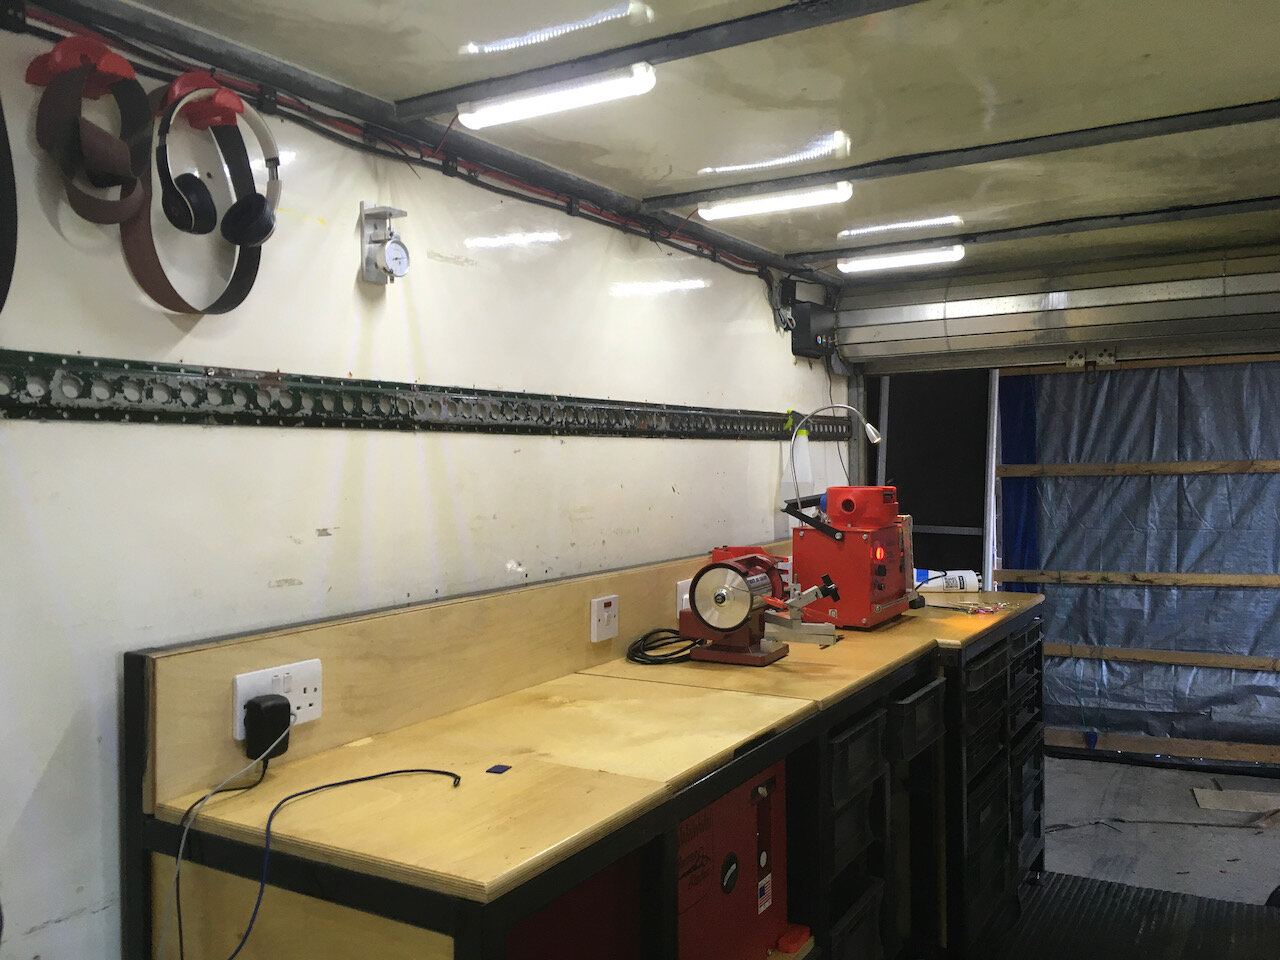
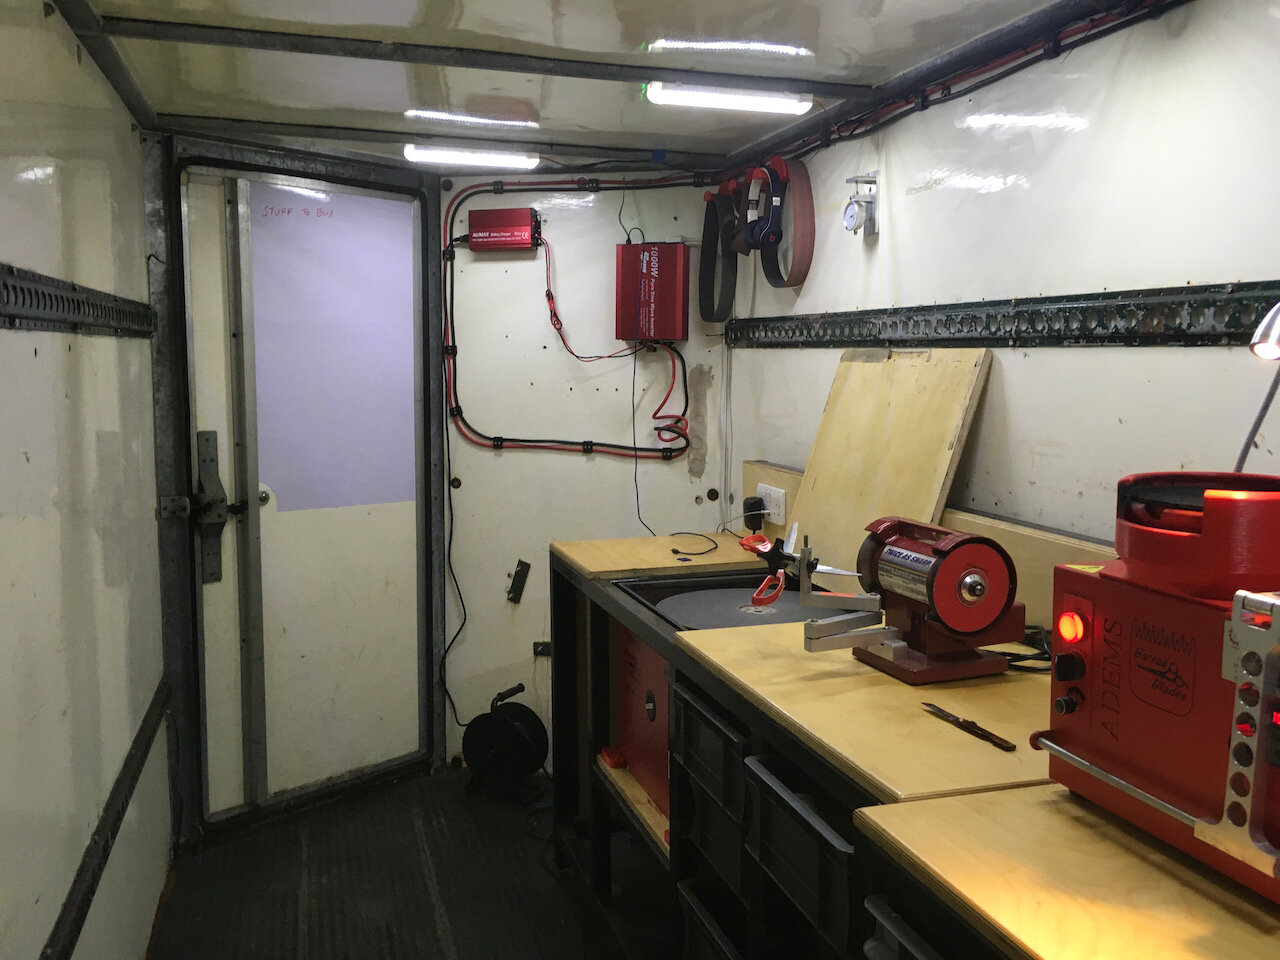
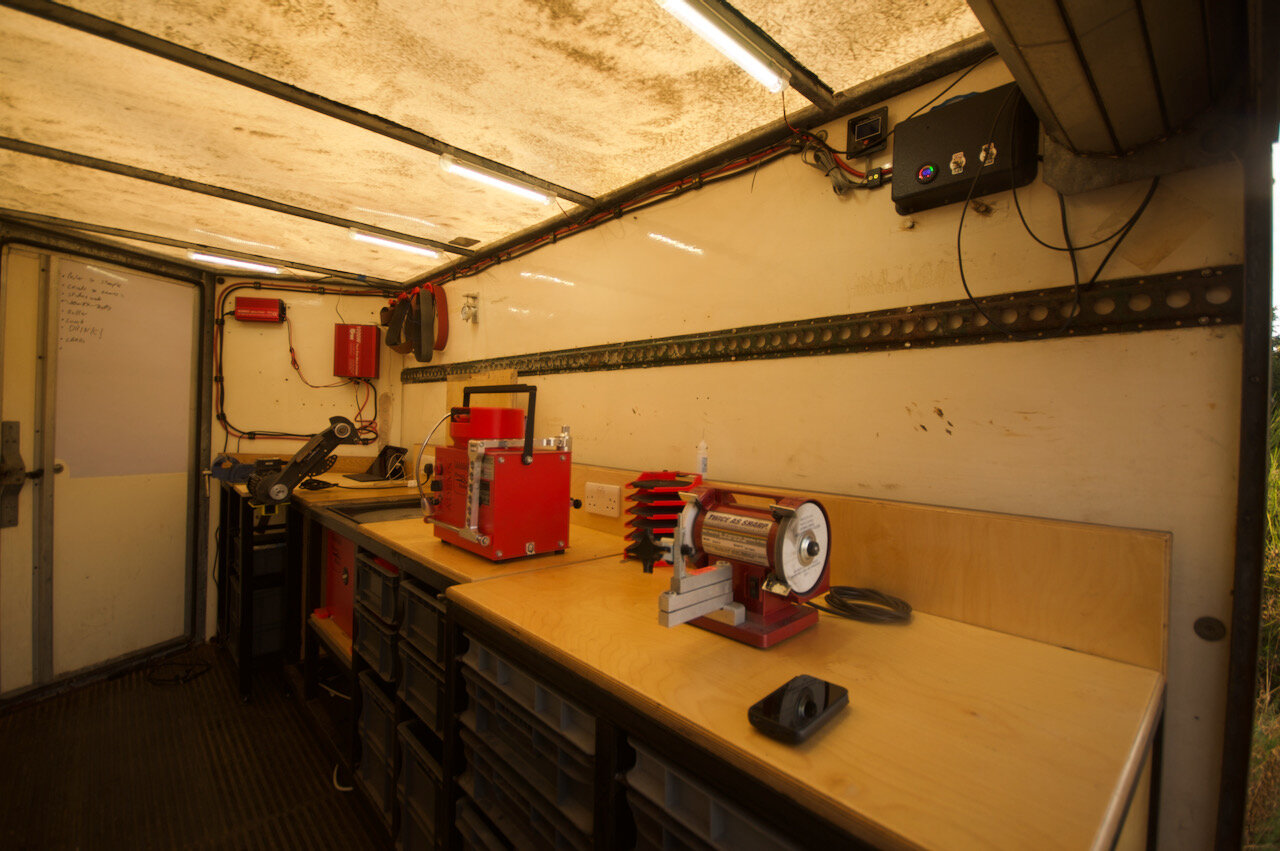
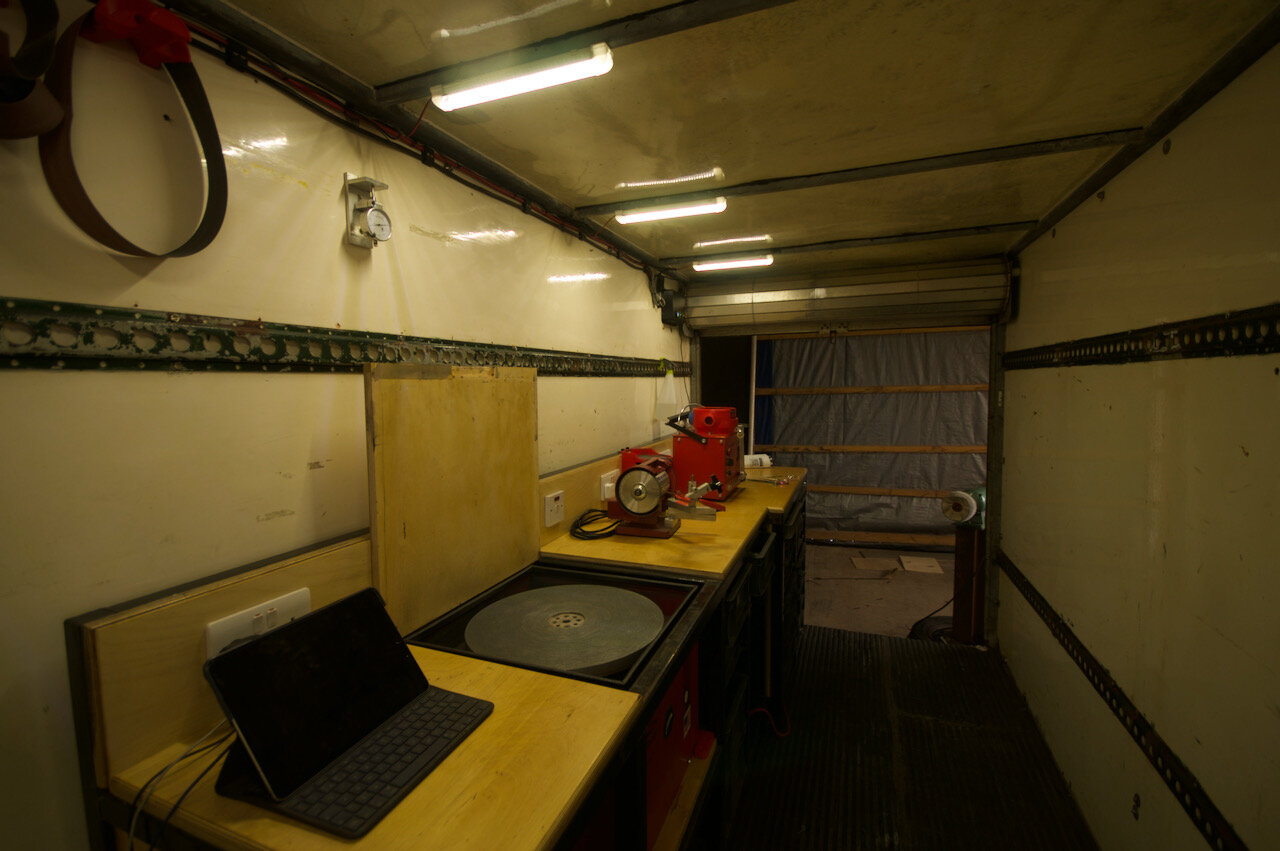
So a quick internal tour

Front View
This is the place whee most of the big items of the electrical system are mounted. Excuse the excess on the cables but i am leaving room should i need to install a bigger inverter
The belt storage is where the belts for the Sorby pro-edge are stored.

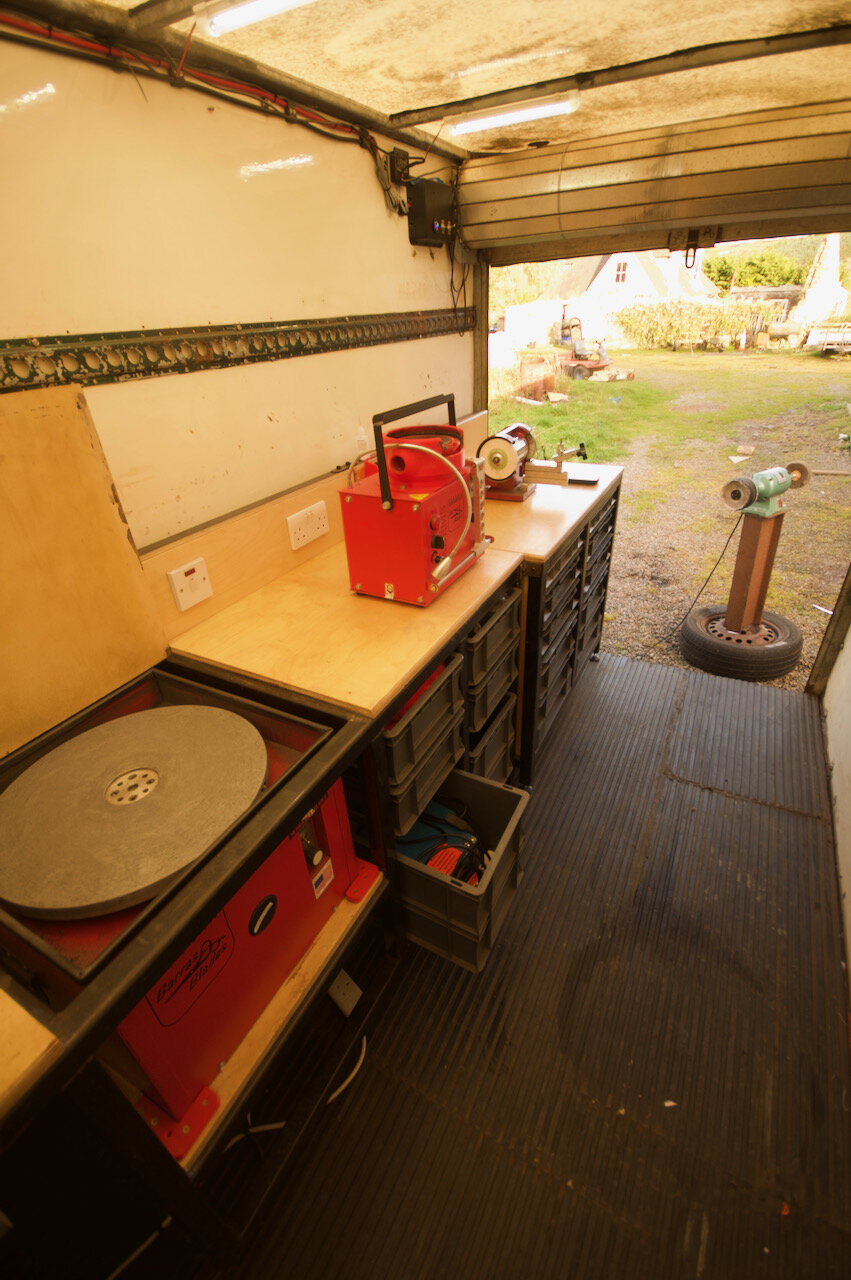
The front bench
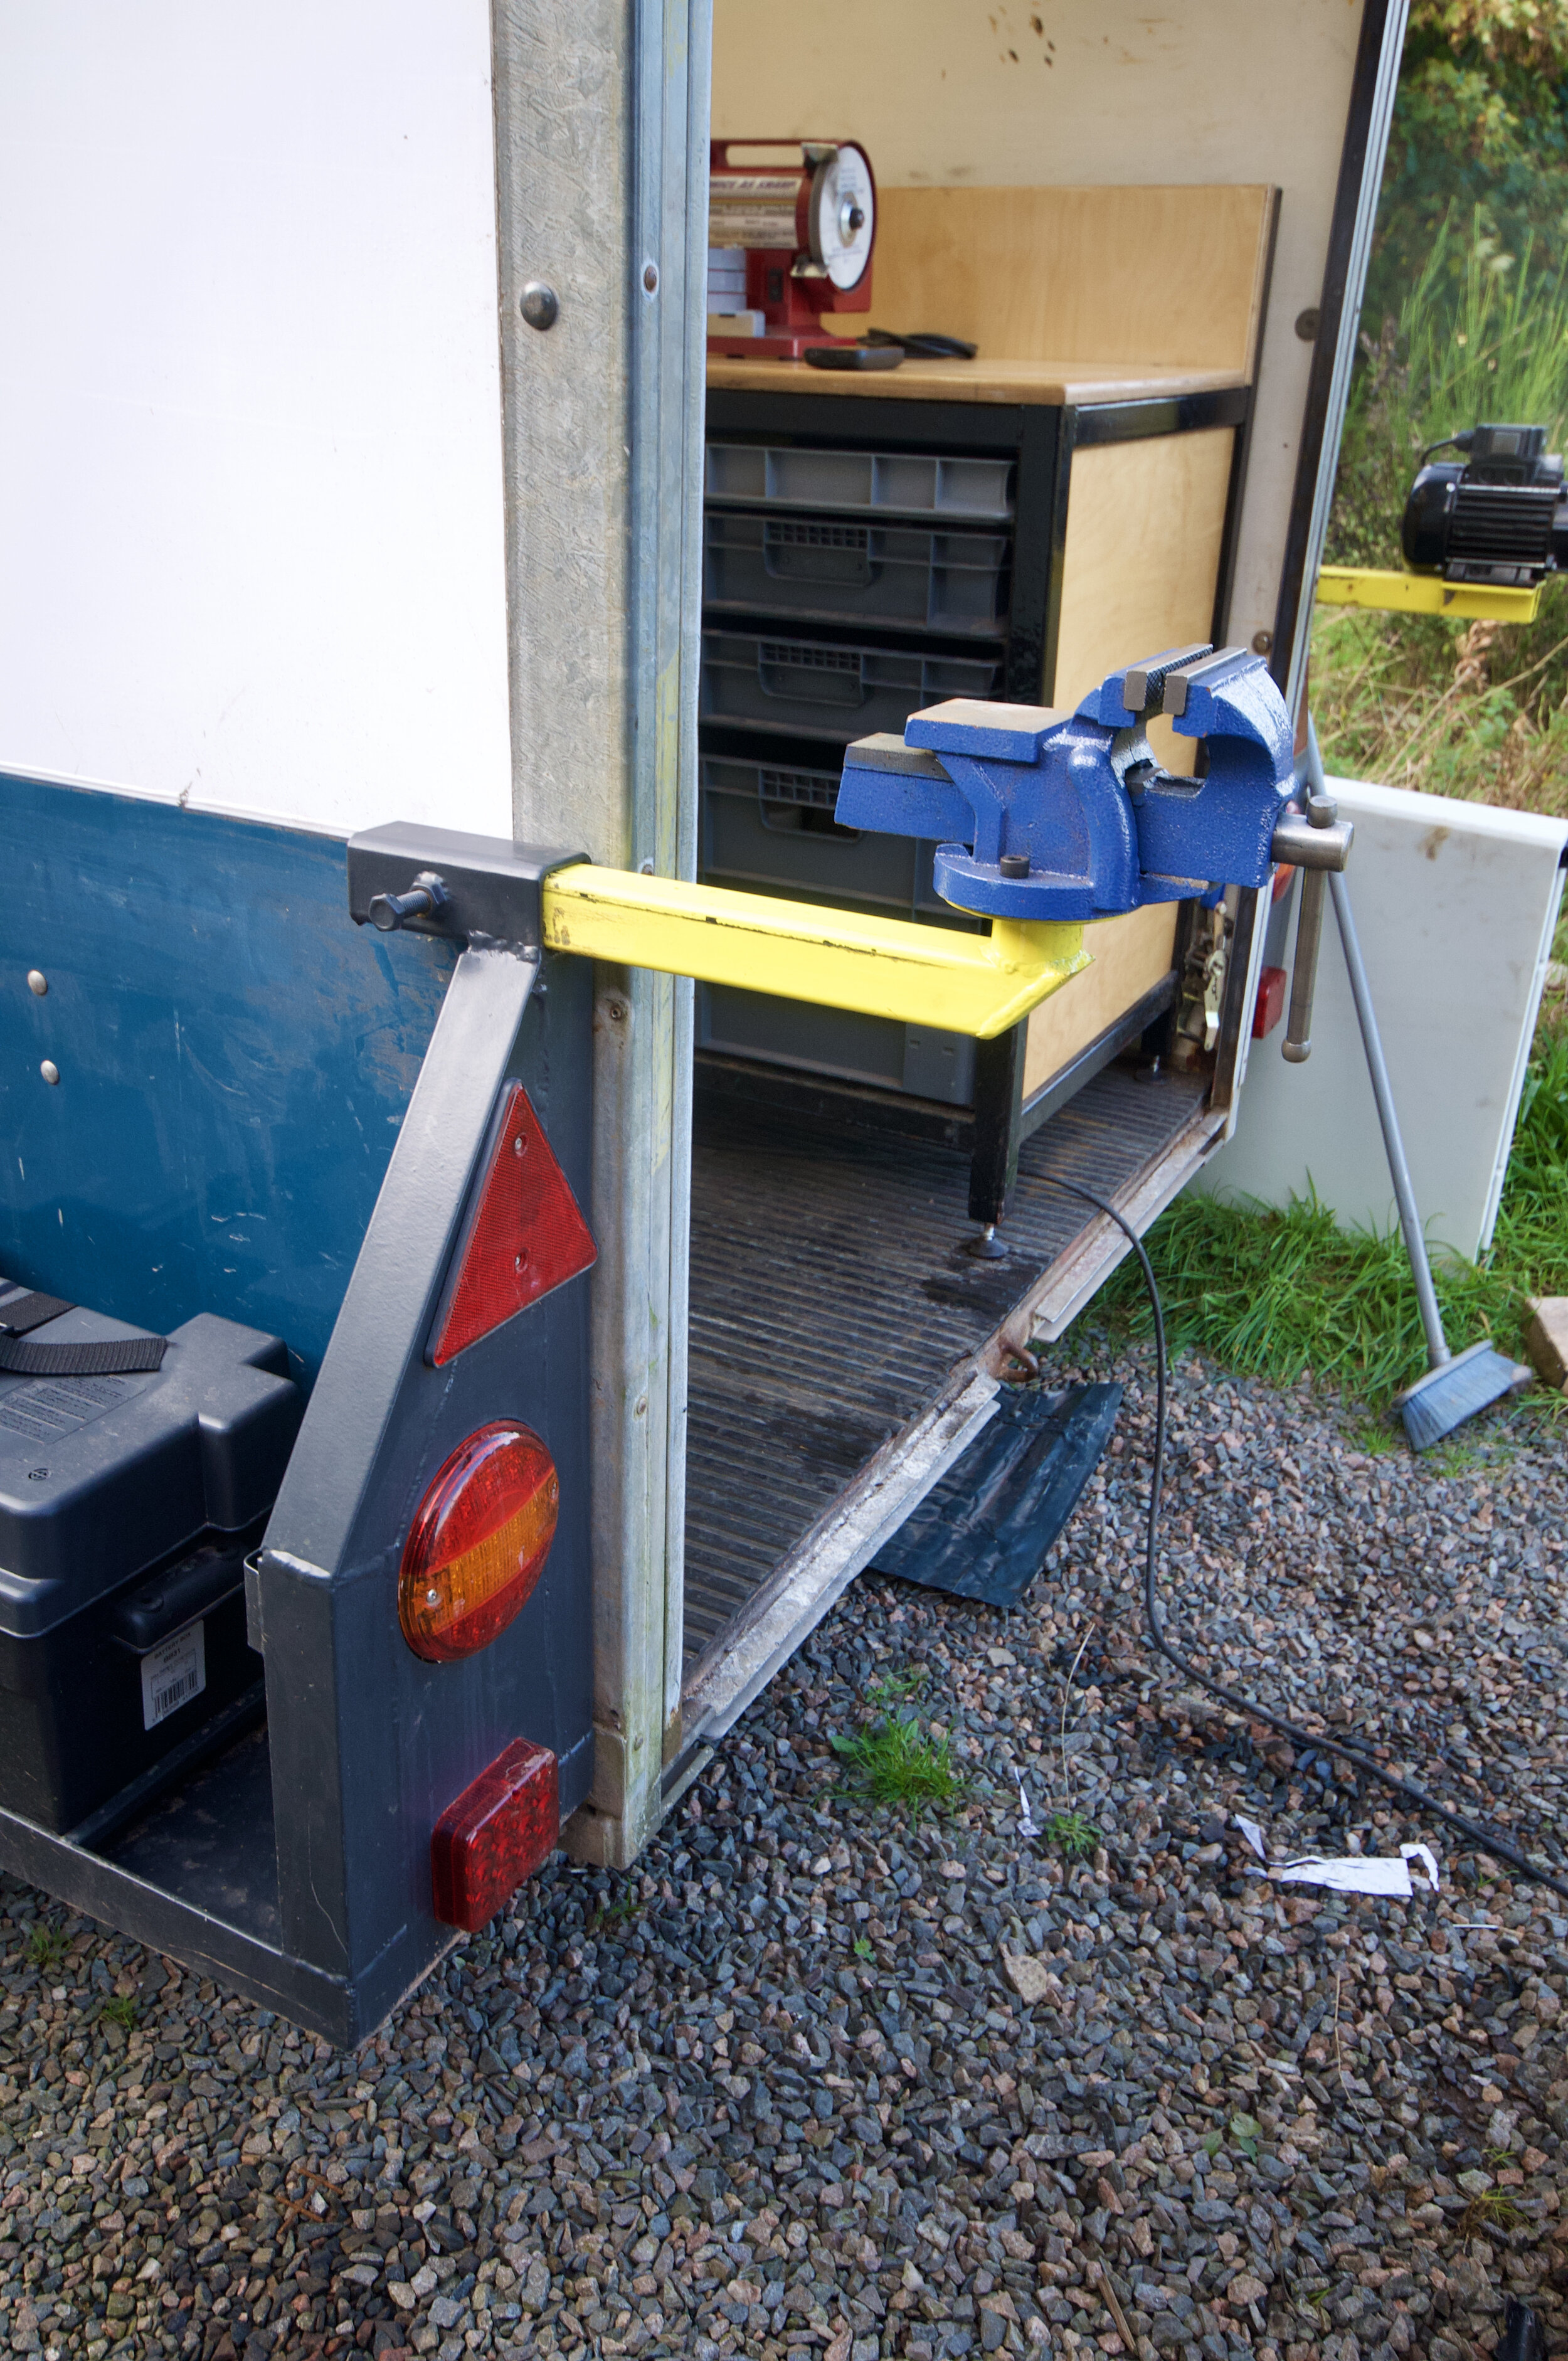
This is the two items that can be mounted in the rear 50mm sockets
The 4 inch vice is mainly used for holding things securely so they can be worked on.
The Sorby Pro-edge is used for the bulk of knife sharpening as well as chisels etc.
The storage drawers lets me carry all sorts of stuff. In the bottom drawer here is one of the TAS

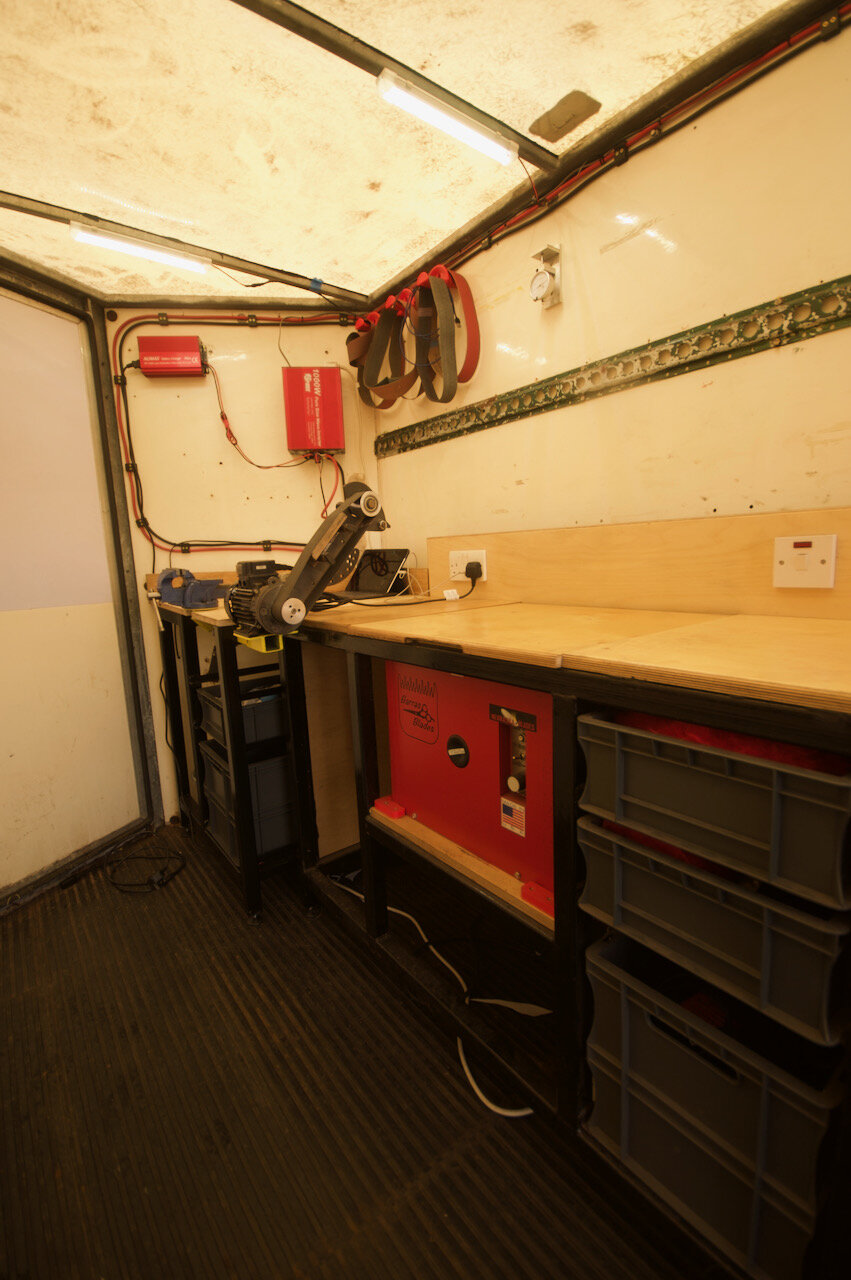
Rear benches
First up is the Big red clipper machine (really must finish its page in tech corner) which is used for sharpening clipper blades
The Corru-gator lives in the bottom drawer for when it is needed
Flat hone aka the russian machine is used for high end hair dressing and grooming scissors
Twice as sharp this is the industrial one used for conventional scissors. Its more expensive brother lives in a drawer for when it is needed
Last but not least is the old buffer sitting outside which is used for cleaning up and de-burring
If you look around the web you will see there is a well known company warning not to use mobile sharpening services.
The reasons given are
Incorrect machinery
The job will be rushed
It is very noisy in the saloon
Lets have a wee go over his points
Incorrect machinery
I carry 4 different machines to service scissors I have two TAS, a Corru-Gator and a Russian made flat hone so I can tackle bevel edge, convex and serrated scissors
The job will be rushed
No reason why I will be rushing in a mobile workshop
It is very noisy in the saloon
I won’t be in the saloon. I’ll be parked up around the corner working away in my workshop. I wouldn’t want to work in your saloon as I won’t have my drawers full of tools etc.
Now the advantage to the customer of a mobile service is as follows
You get your scissors back within the hour
You don’t have to risk posting them off (yes HERMES i’m looking at YOU)
If there is anything wrong then the return process is you trying them before you pay and seeing if you are happy or not
The Pretty Pictures